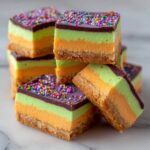
Description
This colorful Rainbow Cookies recipe features delicate almond-flavored layers in red, green, and white, baked to perfection and layered with smooth apricot jam. The cake is finished with a luscious semi-sweet chocolate coating for a delightful treat that’s perfect for holidays or special occasions.
Ingredients
Scale
For the Batter
- 3 sticks (12 ounces) unsalted butter, softened
- 7 ounces almond paste
- 1 1/4 cups granulated sugar
- 1/2 teaspoon kosher salt
- 4 large eggs
- 2 teaspoons almond extract
- 2 cups all-purpose flour
- Red gel food coloring
- Green gel food coloring
For Assembly
- 1 cup smooth apricot jam, divided
- Cooking spray
- Parchment paper
For Chocolate Coating
- 1 1/2 cups semi-sweet chocolate chips (about 8 ounces)
Instructions
- Prepare Ingredients: Soften 3 sticks of unsalted butter at room temperature for about 1 hour until it becomes pliable and ready for mixing.
- Preheat Oven: Arrange two oven racks in the middle and upper positions, then preheat the oven to 350°F to ensure even baking of the layers.
- Prepare Baking Pans: Spray three 9×13-inch baking pans or quarter sheet pans with cooking spray and line each with parchment paper, leaving a 2-inch overhang on two sides to easily remove the baked layers later.
- Make the Batter: Crumble almond paste into a mixing bowl with the softened butter, then add granulated sugar and kosher salt. Use a paddle attachment to mix on medium speed until smooth, about 5 minutes.
- Add Eggs and Flavor: Add the eggs and almond extract to the butter mixture and blend on medium speed until fully combined, approximately 2 minutes.
- Incorporate Flour: Add all-purpose flour to the bowl and mix on low speed until just combined. Scrape down the bowl sides as necessary to ensure even mixing.
- Divide and Color Batter: Split the batter evenly into three separate bowls. Add red gel food coloring to one bowl and mix until it becomes a deep salmon pink. Add green gel food coloring to another bowl until bright green. Leave the third bowl plain for the white layer.
- Bake the Layers: Spread each colored batter evenly into the prepared pans using an offset or rubber spatula. Bake for 10 to 14 minutes, rotating pans halfway through, until the tops are dry but not browned.
- Cool Layers: Remove pans from oven and cool cakes completely on wire racks for about 45 minutes. For faster cooling, place the pans in the refrigerator or freezer briefly.
- Assemble Cake: Place the green layer on a cutting board, spread 1/2 cup apricot jam evenly over it, then layer the plain cake on top and spread the remaining apricot jam. Finish by placing the pink layer on top.
- Press and Chill: Cover the stacked cake with parchment paper, place a baking sheet on top, and weigh down with cans. Refrigerate for at least 2 hours or overnight to allow the layers to set.
- Melt Chocolate: Microwave semi-sweet chocolate chips in a microwave-safe bowl in 30-second intervals, stirring between, until melted and smooth, about 90 seconds total.
- Trim Edges: Remove the top parchment, cans, and baking sheet. Trim cake edges with a sharp knife for evenness, saving scraps for snacking or serving.
- Coat with Chocolate: Spread melted chocolate evenly over the top and sides of the cake using an offset spatula.
- Set Chocolate: Refrigerate the cake until the chocolate hardens, about 30 minutes.
- Slice and Serve: Dip a chef’s knife in hot water, dry it, then cut the cake into 2-inch squares, warming and drying the knife between cuts to prevent the chocolate from cracking.
Notes
- Soften butter well in advance for easier mixing and better batter texture.
- Gel food coloring provides vibrant colors without affecting batter consistency.
- Using parchment overhangs creates an easy way to lift cake layers out of the pans without damage.
- Chilling the assembled cake ensures cleaner slices and helps the layers meld together perfectly.
- Warm the knife between cuts to maintain smooth clean chocolate edges.
- Save trimmed scraps for a delicious snack or crumble over ice cream for added texture.