
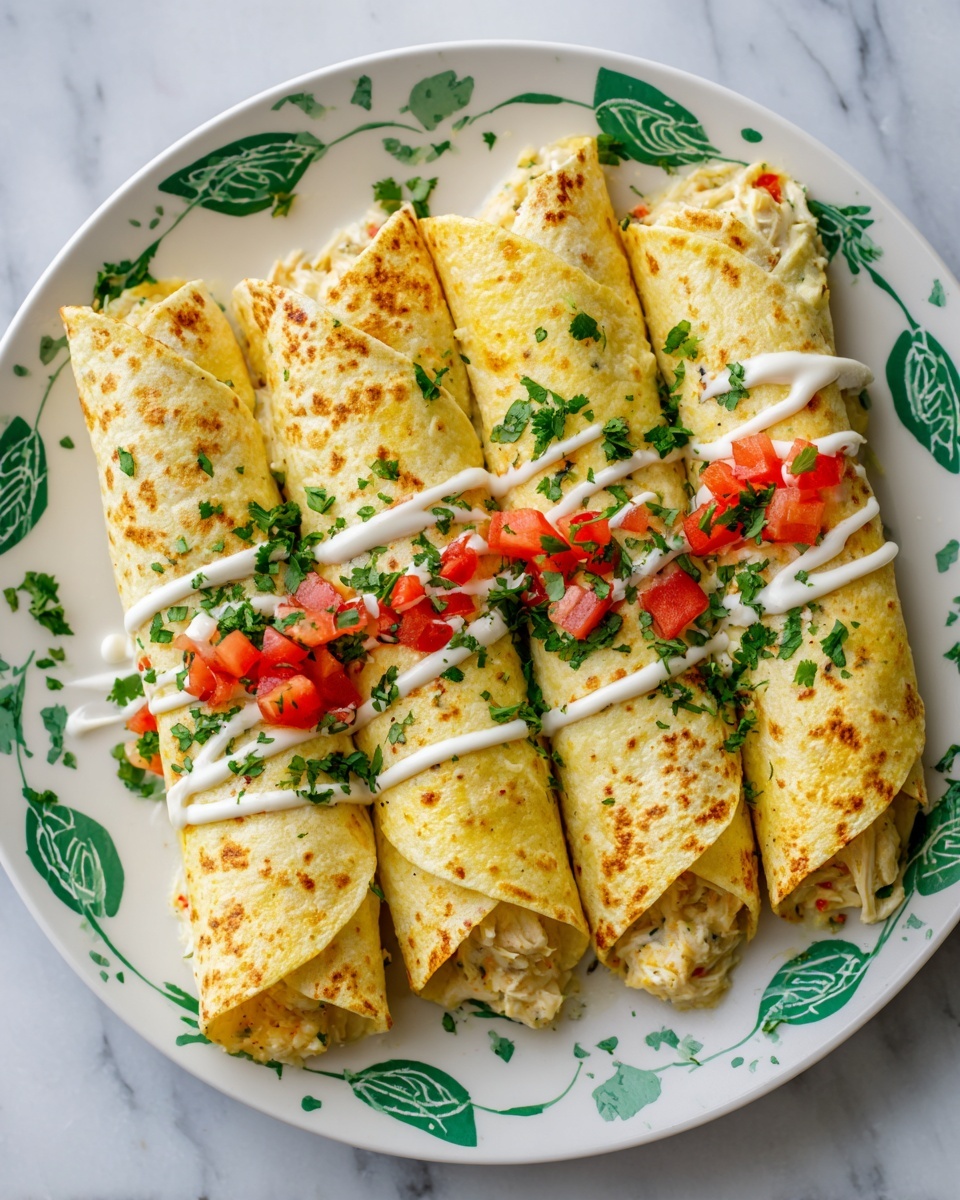
If you have been searching for a delicious, low-carb snack that feels indulgent and satisfying, the Keto Chicken Cheese Taquitos Recipe is going to become your new favorite. This recipe combines tender shredded chicken with creamy cheese and just a hint of jalapeno for a little kick. Wrapped in crispy, golden cheese shells that bake up perfectly in the oven, these taquitos are an amazing way to enjoy your favorite flavors while staying keto-friendly. Whether you are meal prepping or need a quick appetizer for friends, this recipe hits every note with its perfect balance of texture and taste.
Ingredients You’ll Need
The beauty of this Keto Chicken Cheese Taquitos Recipe lies in the simplicity and quality of its ingredients. Each one plays a pivotal role in building flavor, texture, and that irresistible hold-your-hand appeal when you’re snacking.
- 1 Cup Chicken Breast, cooked and shredded: Tender protein that forms the hearty base for the filling.
- 8 Ounces Sharp Cheddar Cheese, shredded or 12 square slices: Crispy and golden on the outside, melty and flavorful inside.
- 1 Jalapeno, deseeded and minced: Adds just the right amount of spicy brightness without overwhelming.
- 1/2 Cup Cream Cheese, softened: Creates a creamy texture that binds the filling together.
- 2 Tablespoons Chives, chopped: Fresh herbal notes that elevate the flavor profile.
- 1/2 Teaspoon Kosher Salt: Essential to bring out the full depth of all other ingredients.
- Shredded Lettuce: To serve alongside, adding crunch and freshness.
- Salsa: A tangy, spicy complement for dipping.
- Sour Cream: Cool and creamy, perfect for balancing the heat.
How to Make Keto Chicken Cheese Taquitos Recipe
Step 1: Preheat Oven and Prepare Baking Sheet
Start by preheating your oven to 400°F (200°C) and lining a baking sheet with parchment paper. This prep step ensures the cheese squares won’t stick, making cleanup effortless and helping you get that perfect golden crispiness on your cheese shells.
Step 2: Mix the Filling
In a large bowl, combine the shredded chicken, softened cream cheese, minced jalapeno, chopped chives, and kosher salt. Mix everything thoroughly until all ingredients blend into a smooth, creamy filling. This mixture is bursting with flavor and will be the heart of your taquitos, so take a moment to enjoy how vibrant the combination looks and smells.
Step 3: Form Cheese Shells
On your prepared baking sheet, spoon out approximately 1/4 cup of shredded cheddar cheese for each taquito, forming 12 neat flat squares. Space these squares about an inch apart to allow air to circulate and help them bake evenly. If you need more room, use two baking sheets—this step is crucial for that perfectly crispy cheese “tortilla.”
Step 4: Bake Cheese Squares
Bake the cheese squares in your preheated oven for about 9 to 12 minutes. Keep an eye on them; you want their edges to just start turning golden brown and crisp. This is the magic moment that transforms the cheese into a sturdy, crunchy shell ready to hold that luscious chicken filling.
Step 5: Cool and Roll
Once baked, remove the cheese squares from the oven and let them cool for around 3 minutes. They need to be cool enough to handle without breaking but still pliable for rolling. Spoon a generous amount of the chicken filling onto one edge of each crisp cheese square, then gently roll the cheese around the filling toward the open edge—forming the classic taquito shape that’s as fun to eat as it is to make.
Step 6: Serve Warm
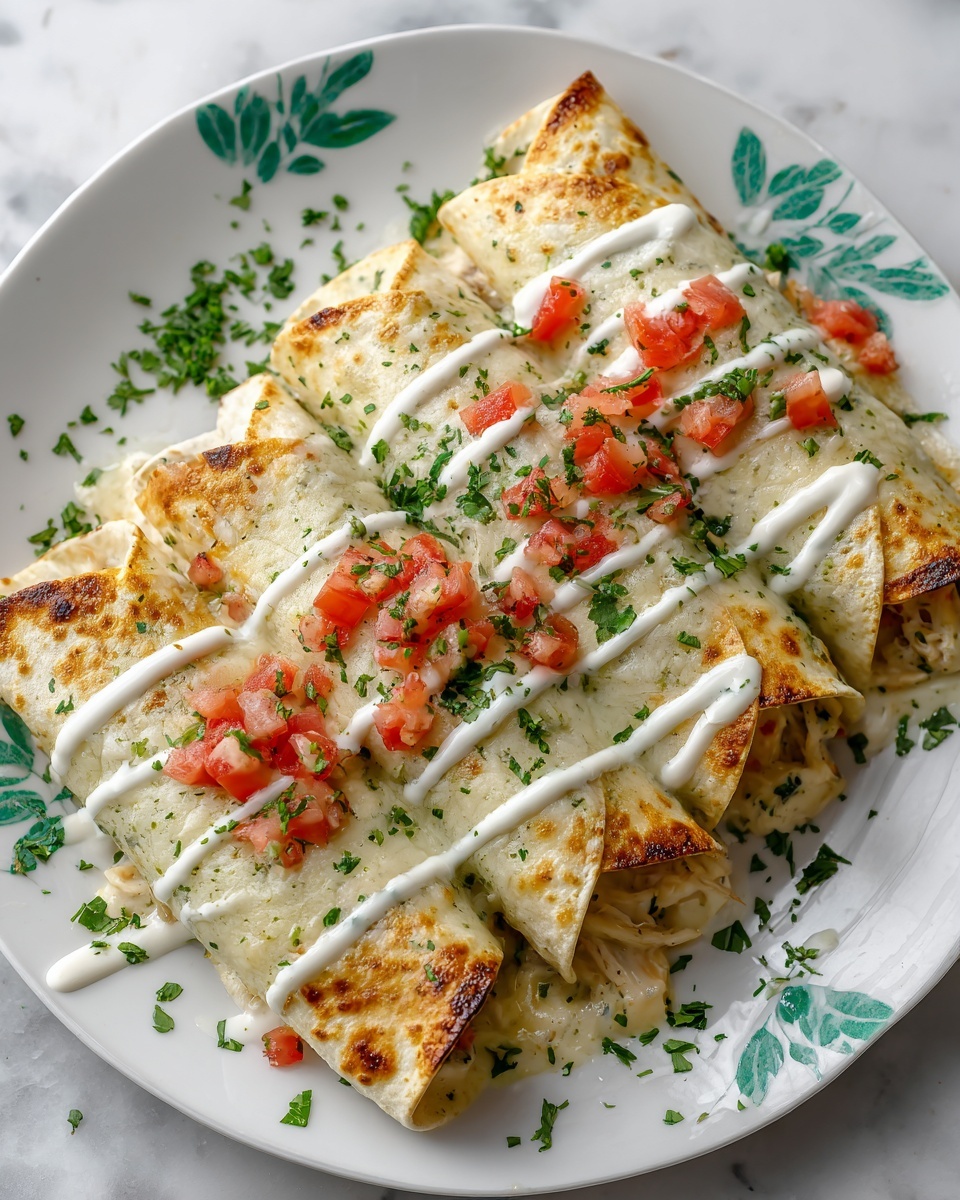
These taquitos are best enjoyed right away while the cheese is still warm and crisp. Pair with your favorite garnishes for a flavor explosion in every bite!
How to Serve Keto Chicken Cheese Taquitos Recipe
Garnishes
Adding shredded lettuce brings a refreshing crunch that balances the richness of the cheese and chicken. Salsa introduces a tangy and slightly spicy element, and sour cream provides a cool, creamy counterpoint that rounds out the flavor perfectly. These simple garnishes elevate the experience and keep every bite exciting.
Side Dishes
For a complete meal, try serving your Keto Chicken Cheese Taquitos Recipe alongside a fresh avocado salad or some roasted low-carb vegetables like zucchini ribbons or asparagus. These sides add vibrant colors and textures, making your plate a well-rounded celebration of keto-friendly goodness.
Creative Ways to Present
If you want to impress guests or add variety, consider skewering the taquitos with colorful toothpicks and serving them as finger food at parties. You can also arrange them on a platter with dollops of guacamole or a spicy chipotle mayo. Presentation can turn this straightforward dish into a real crowd-pleaser.
Make Ahead and Storage
Storing Leftovers
Pop any leftover taquitos into an airtight container and refrigerate them. They should stay fresh and tasty for up to three days, giving you a quick snack or meal option ready to go without sacrificing flavor or texture.
Freezing
You can freeze these taquitos, especially if you’ve made a large batch. Place them in a single layer on a baking sheet to flash freeze, then transfer to a freezer-safe container or bag. They’ll keep for up to two months and thaw quickly when you’re ready to enjoy them.
Reheating
To reheat, the best method is to pop them back into a preheated oven at 350°F (175°C) for about 8 to 10 minutes. This step crisps the cheese shell again and warms the filling without making it soggy, restoring that just-baked texture and flavor.
FAQs
Can I use other types of cheese for this recipe?
Absolutely! While sharp cheddar gives a great balance of flavor and crispiness, you can try mozzarella for a gooier texture or pepper jack for extra spice. Just choose cheeses that melt well and crisp nicely.
Is there a way to make this recipe spicier?
Yes! You can leave the jalapeno seeds in for more heat or add a pinch of cayenne pepper or chili powder to the filling. Adjust to your spice preference, and remember the garnishes can help cool things down if needed.
Can I substitute the chicken breast with another protein?
Definitely! Shredded cooked turkey or even pulled pork would work well here. Just ensure the meat is shredded finely to maintain that perfect taquito filling texture.
Are these taquitos suitable for meal prepping?
Yes, they’re fantastic for meal prep. Make a batch ahead, store them in the fridge or freezer, and reheat as needed. They’re a convenient, satisfying snack or meal anytime.
Do I have to bake the cheese shells before rolling?
Baking the cheese first is crucial to achieve that sturdy, crispy shell that holds together when rolled. Trying to roll the cheese raw will cause it to break and become greasy instead of crisp.
Final Thoughts
There is nothing quite like the comfort and joy of homemade Keto Chicken Cheese Taquitos Recipe to satisfy those cravings without derailing your low-carb lifestyle. From the crispy cheese shells to the rich, flavorful filling, this recipe is a wonderful way to enjoy a delicious snack or meal with family and friends. Give it a try—you might just find it becoming your go-to recipe for game day, gatherings, or a cozy night in.
Print
Keto Chicken Cheese Taquitos Recipe
- Prep Time: 15 minutes
- Cook Time: 12 minutes
- Total Time: 40 minutes
- Yield: 16 servings
- Category: Snack
- Method: Baking
- Cuisine: American
- Diet: Low Carb
Description
These Keto Chicken Cheese Taquitos are a delicious low-carb snack perfect for keto enthusiasts. Crispy baked cheddar cheese shells are filled with a creamy, spicy chicken mixture and rolled into bite-sized taquitos. Served warm with fresh lettuce, salsa, and sour cream, they make a savory and satisfying treat that’s quick and easy to prepare.
Ingredients
Chicken Filling
- 1 Cup Chicken Breast, cooked and shredded
- 1/2 Cup Cream Cheese, softened
- 1 Jalapeno, deseeded and minced
- 2 Tablespoons Chives, chopped
- 1/2 Teaspoon Kosher Salt
Cheese Shells
- 8 Ounces Sharp Cheddar Cheese, shredded or 12 square slices
Optional Toppings
- Shredded Lettuce
- Salsa
- Sour Cream
Instructions
- Preheat Oven: Preheat your oven to 400°F (200°C) and line a baking sheet with parchment paper to prevent sticking and enable easy cleanup.
- Prepare Filling: In a large bowl, mix together the cooked shredded chicken breast, softened cream cheese, minced jalapeno, chopped chives, and kosher salt until all ingredients are evenly combined.
- Create Cheese Shells: On the prepared baking sheet, form 12 flat squares using shredded cheddar cheese, about 1/4 cup per square. Arrange the squares about 1 inch apart; if needed, use two baking sheets for spacing.
- Bake Cheese Shells: Bake the cheese squares in the preheated oven for 9 to 12 minutes, until the edges are golden brown and the cheese is crispy.
- Cool Cheese Shells: Remove from the oven and let the cheese squares cool for about 3 minutes until they are firm enough to handle but not completely hardened.
- Assemble Taquitos: Spoon the chicken filling onto one edge of each cheese square, then carefully roll the cheese around the filling toward the open edge to form a taquito shape.
- Serve: Serve the taquitos warm with optional shredded lettuce, salsa, and sour cream for additional flavor and texture. Enjoy your keto-friendly snack!
Notes
- If you don’t have cooked chicken breast, you can boil raw chicken breasts in water with a pinch of salt until fully cooked, about 15-20 minutes, then shred.
- Make sure the cheese squares are spaced well to allow even crisping and easy handling when assembling.
- Allow the cheese shells to cool just enough to handle, or they might break when rolling.
- Customize the filling by adding spices like cumin or chili powder for extra flavor.

