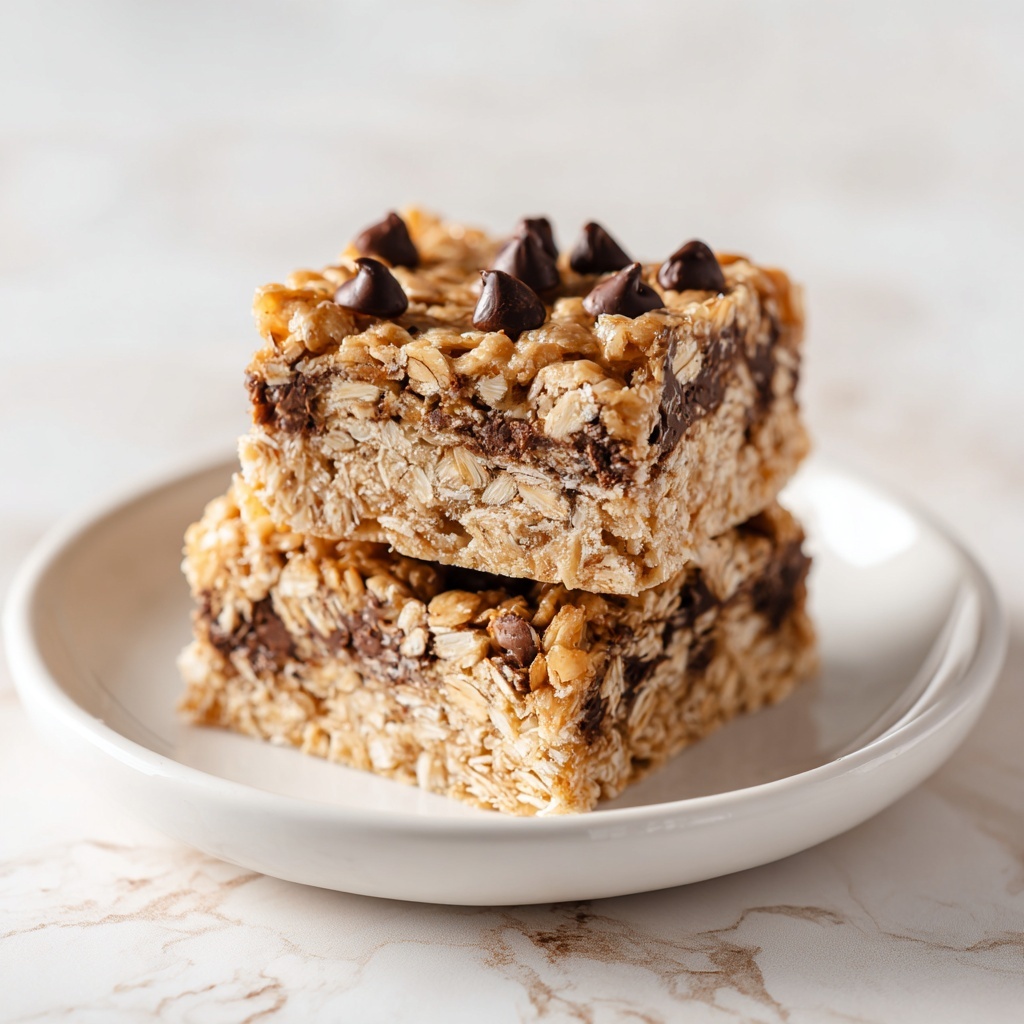
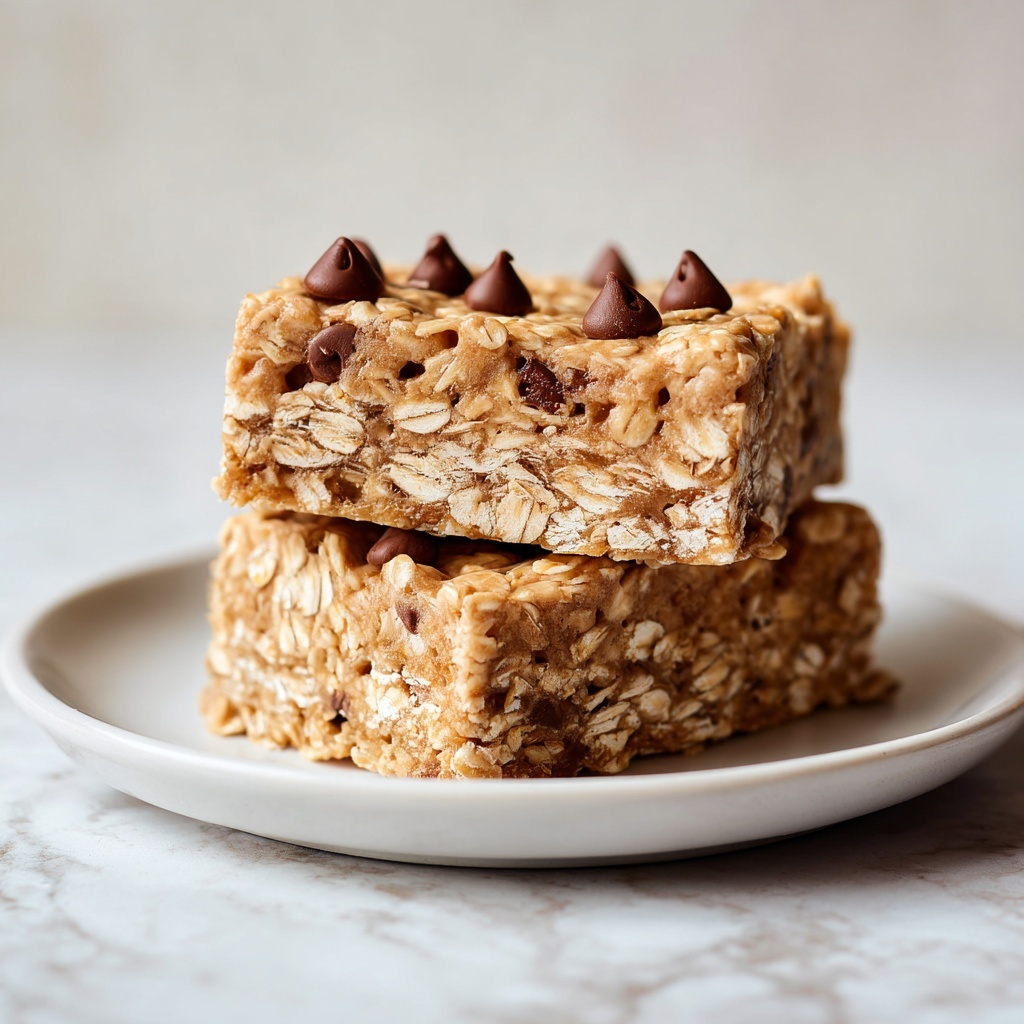
If you’ve ever craved a sweet, crispy treat that’s both nostalgic and utterly satisfying, this Homemade Crunch Bars Recipe is about to become your new favorite snack. Combining the perfect crunch of rice cereal with smooth, melted chocolate and gooey marshmallows, these bars strike a wonderful balance of textures and flavors that will make every bite feel like a small celebration. Plus, they come together in less time than it takes to decide on a movie, making them an irresistible go-to whenever you need a quick pick-me-up or a crowd-pleasing dessert.
Ingredients You’ll Need
With just a handful of simple ingredients, these bars showcase how a few well-chosen staples can come together to create something truly special. Each component plays a crucial role, from the crunchy texture of the rice cereal to the rich, velvety chocolate that binds everything perfectly.
- Rice cereal: Provides that signature crisp texture that makes each bar so delightful to munch on.
- Chocolate chips (semi-sweet or dark): Deliver deep, luscious flavor and help bind the bars with creamy goodness.
- Unsalted butter: Adds richness to the mixture and smooths out the chocolate for a perfect consistency.
- Mini marshmallows: Melt down to create a sweet, chewy contrast that holds everything together.
- Optional toppings (nuts or sprinkles): A fun way to add texture, color, or a hint of extra flavor to personalize your bars.
How to Make Homemade Crunch Bars Recipe
Step 1: Prepare Your Baking Dish
Start by greasing an 8×8-inch baking dish with butter or cooking spray. This simple step ensures your bars will come out cleanly once set, making serving and cleanup a breeze.
Step 2: Melt Butter and Chocolate
In a medium saucepan set to low heat, gently melt the butter and chocolate chips together. Stir frequently until the mixture is completely smooth—this rich, melted base is the heart of your crunch bars.
Step 3: Add Mini Marshmallows
Next, mix in the mini marshmallows and keep stirring until they melt fully into the chocolate mixture. This creates a sticky, sweet binder that makes the bars hold their shape while adding a lovely, chewy texture.
Step 4: Fold in Rice Cereal
Carefully fold the rice cereal into the chocolate and marshmallow mixture, making sure every piece of cereal is evenly coated. This step is where the magic happens—the crunch meets the creamy, sticky chocolate, delivering that classic texture everyone loves.
Step 5: Press the Mixture Into the Dish
Pour the combined mixture into your greased baking dish, pressing it down firmly with a spatula or your hands. Creating an even layer is key to getting those perfect bars with great texture in every bite.
Step 6: Add Optional Toppings
If you’re feeling adventurous or want a personal touch, sprinkle nuts, colorful sprinkles, or any other toppings over the bars before they cool. This adds visual appeal and an extra layer of flavor and texture.
Step 7: Chill and Slice
Refrigerate the dish for about 30 minutes, or until the bars are fully set. Once firm, slice them into squares and get ready to enjoy your delicious homemade creation!
How to Serve Homemade Crunch Bars Recipe

Garnishes
The versatility of homemade crunch bars shines with simple garnishes. A light drizzle of melted white chocolate or a sprinkle of sea salt can raise the flavor profile, balancing sweetness with a touch of sophistication. Fresh berries alongside add a pop of color and freshness for a delightful contrast.
Side Dishes
These bars pair beautifully with a cold glass of milk or a steaming cup of coffee or tea. They’re also excellent served with fresh fruit for a snack that feels indulgent but balanced. Consider serving alongside vanilla yogurt or even ice cream for a fun dessert platter.
Creative Ways to Present
For parties or gifting, try cutting the bars into fun shapes using cookie cutters or wrapping individual pieces in parchment paper tied with colorful twine. Layering them in a decorative tin with wax paper dividers instantly elevates this simple treat into something special that friends and family will adore.
Make Ahead and Storage
Storing Leftovers
Store any leftover homemade crunch bars in an airtight container at room temperature. They will maintain their crunch and freshness for up to 3 days, making them perfect for quick snacks during your busy week.
Freezing
If you want to prepare these bars well in advance, they freeze wonderfully. Separate the bars with parchment paper to prevent sticking, then place them in a freezer-safe container or zip-top bag. When stored correctly, they can last up to 2 months in the freezer.
Reheating
Generally, these bars are best enjoyed cold or at room temperature to maintain their crunch factor. If you do prefer them warmed, a few seconds in the microwave will soften the chocolate, but be careful not to melt them too much or lose that delightful crunch.
FAQs
Can I use different types of cereal in this recipe?
Absolutely! While rice cereal is classic for homemade crunch bars because of its light, crispy texture, you can experiment with cornflakes or even puffed quinoa to create new textures and flavors.
Is it necessary to refrigerate the bars?
Refrigeration helps the bars set firmly and makes slicing easier, but if you prefer a softer bar, you can let them cool at room temperature before cutting, though they may be a bit more delicate when handled.
Can I substitute the chocolate chips with something else?
Yes! You can use white chocolate, milk chocolate, or even peanut butter chips for a different flavor profile. Just keep in mind that sweeter chips might alter the overall sweetness of the bars.
Are these bars gluten-free?
This recipe can be gluten-free if you use a gluten-free rice cereal brand. Always double-check your cereal and any toppings you use to ensure they meet your dietary needs.
How do I make these bars nut-free?
Simply omit any nuts from the optional toppings and check that all ingredients you use have not been processed with nuts to avoid cross-contamination. The base recipe itself is naturally nut-free.
Final Thoughts
Whipping up this Homemade Crunch Bars Recipe is not only a joy but a delicious way to bring a little extra sweetness and fun into your day. Whether you’re making a batch for your family, a crowd, or just treating yourself, these bars offer that perfect combination of crunch, chocolate, and marshmallowy goodness that’s hard to resist. So grab your ingredients, gather your friends, and dive into the delightful simplicity of homemade crunch bars—you won’t regret it!
Print
Homemade Crunch Bars Recipe
- Prep Time: 10 minutes
- Cook Time: 10 minutes
- Total Time: 40 minutes
- Yield: 16 servings
- Category: Dessert
- Method: Stovetop
- Cuisine: American
Description
Homemade Crunch Bars are a quick and delightful treat combining the crunchiness of rice cereal with a rich, melty chocolate and marshmallow mixture. Perfect for an easy dessert or snack, these bars are made by melting butter, chocolate chips, and marshmallows together, then mixing in rice cereal and pressing the mixture into a pan to set. Optional toppings like nuts or sprinkles add an extra touch of fun and texture.
Ingredients
Main Ingredients
- 3 cups rice cereal
- 1 cup chocolate chips (semi-sweet or dark)
- 4 tablespoons unsalted butter
- 2 cups mini marshmallows
Optional Toppings
- Nuts (such as chopped peanuts or almonds)
- Sprinkles
Instructions
- Prepare Baking Dish: Grease an 8×8-inch baking dish thoroughly with butter or cooking spray to prevent sticking and make it easier to remove the bars later.
- Melt Butter and Chocolate: In a medium saucepan over low heat, gently melt the unsalted butter and chocolate chips together, stirring frequently until you have a smooth, combined mixture without lumps.
- Add Marshmallows: Stir in the mini marshmallows to the melted chocolate and butter. Continue stirring over low heat until the marshmallows are completely melted and the mixture is creamy and homogeneous.
- Combine with Rice Cereal: Remove the saucepan from heat and gently fold in the rice cereal, making sure all the cereal is evenly coated with the chocolate-marshmallow mixture without crushing it.
- Press into Dish: Pour the sticky mixture into the prepared baking dish. Use a spatula or your hands (lightly greased) to press it down firmly, creating an even and compact layer.
- Add Toppings: While the mixture is still warm, sprinkle your chosen optional toppings like nuts or sprinkles evenly on top and gently press them to adhere.
- Chill to Set: Refrigerate the dish for about 30 minutes, allowing the bars to firm up completely. Once set, slice into 16 squares and serve.
Notes
- Use semi-sweet or dark chocolate chips for a richer flavor, but milk chocolate can also be substituted.
- Make sure to melt the ingredients over low heat to avoid burning or seizing the chocolate.
- Press the mixture firmly into the pan to ensure the bars hold together well when cut.
- Store the bars in an airtight container in the refrigerator to keep them fresh for up to a week.
- For a nut-free version, omit any nut toppings and use allergy-friendly sprinkles.
