
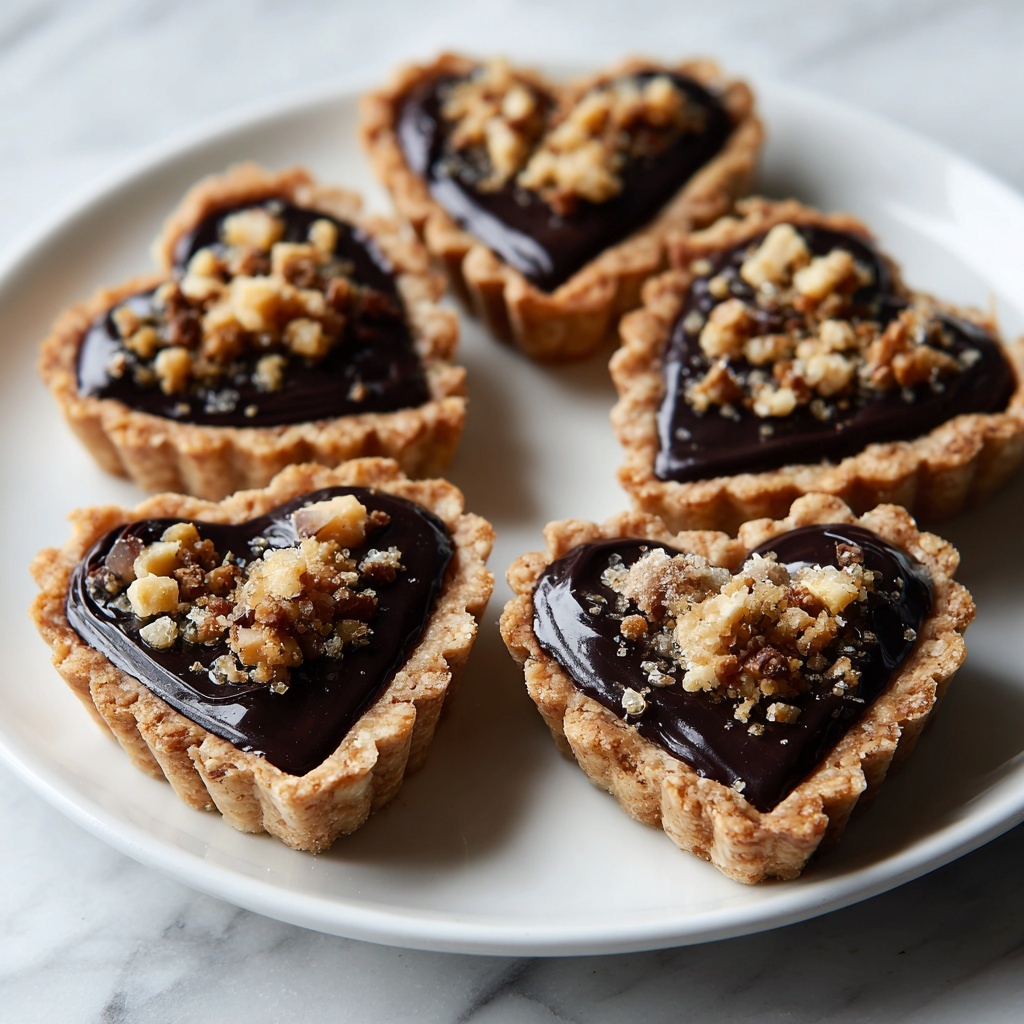
If you’re on the hunt for a delightful treat that’s as charming as it is delicious, the Heart Shaped Chocolate Thumbprint Cookies Recipe is an absolute must-try. These cookies boast a perfect balance of rich cocoa flavor and sweet, fruity jam nestled right in the center, making every bite a cozy and melt-in-your-mouth experience. Whether you’re baking for a special someone or just craving a homemade delight, this recipe captures the warmth and joy of sharing love through food, all wrapped up in adorable heart shapes.

Ingredients You’ll Need
This recipe combines simple pantry staples and a touch of fruitiness to create cookies that are irresistible both in taste and appearance. Each ingredient plays a vital role in the texture, flavor, and color, bringing this charming dessert to life with ease.
- 1 ½ cups all-purpose flour: Provides the structure that holds these cookies together with a tender crumb.
- ½ cup cocoa powder: This gives the cookies their deep chocolatey richness and beautiful dark color.
- 1 teaspoon baking powder: Helps the cookies rise slightly, keeping them soft but not cakey.
- ¼ teaspoon salt: Balances sweetness and enhances the chocolate flavor.
- ½ cup unsalted butter (softened): Key for a buttery, melt-in-your-mouth texture without overwhelming saltiness.
- ½ cup granulated sugar: Adds just the right amount of sweetness and helps with browning.
- 1 large egg: Binds ingredients together and adds richness.
- 1 teaspoon vanilla extract: Brightens the overall flavor with classic warmth.
- ¼ cup milk: Keeps the dough moist and easy to shape.
- ¼ cup fruit jam (raspberry, strawberry, or your favorite flavor): The star in the center that adds vibrant color and luscious sweetness.
How to Make Heart Shaped Chocolate Thumbprint Cookies Recipe
Step 1: Prep Your Oven and Dry Ingredients
Start by preheating your oven to 350°F (175°C) and lining a baking sheet with parchment paper to prevent sticking. In a medium bowl, whisk together the all-purpose flour, cocoa powder, baking powder, and salt. This dry mix forms the base for your cookie dough and ensures even flavor distribution.
Step 2: Cream Butter and Sugar
In a separate, larger bowl, use an electric mixer or a sturdy spoon to cream the softened butter and granulated sugar until the mixture becomes light and fluffy. This step is crucial — it introduces air into the dough, helping the cookies develop that tender, soft texture everyone loves.
Step 3: Combine Wet Ingredients
Add the egg and vanilla extract to your creamed butter and sugar, mixing until everything is well incorporated. This combination adds moisture and richness that makes the cookies satisfying and flavorful.
Step 4: Mix Wet and Dry Ingredients
Gradually stir in your dry ingredients into the wet mixture, blending just until combined. Overmixing can toughen the dough, so be gentle! Then add in the milk, stirring until the dough comes together into a soft, pliable ball.
Step 5: Shape Your Cookies
Take small portions of dough—about one inch in diameter—and roll them into smooth balls. Place these evenly spaced on your prepared baking sheet. Now, here’s the fun part: press your thumb or the back of a spoon firmly in the center of each ball, creating that classic thumbprint indentation perfect for holding the jam.
Step 6: Add the Jam and Bake
Fill each thumbprint with roughly a half teaspoon of your chosen fruit jam, gently nestling it into the indentation without overflowing. Pop the tray into the oven and bake for 10 to 12 minutes, until the cookies feel firm to the touch but still tender. Give them a moment on the hot tray before letting them cool completely on a wire rack.
How to Serve Heart Shaped Chocolate Thumbprint Cookies Recipe
Garnishes
Elevate your cookies with delicate garnishes like a light dusting of powdered sugar or a drizzle of melted white chocolate. Fresh berries alongside each cookie can add a burst of color and a fresh tart contrast, turning your treat into a true showstopper for any occasion.
Side Dishes
Pair these chocolate thumbprint cookies with a scoop of vanilla ice cream or a cup of rich hot cocoa for a dreamy dessert experience. They also complement a simple fruit salad, creating a delightful balance between decadent and refreshing flavors.
Creative Ways to Present
For gifting or special events, arrange these cookies on a decorative platter or tiered cake stand. Wrapping them in cellophane tied with a ribbon adds a personal touch. You can even sandwich two cookies with jam inside for a double-layered treat that’s as cute as it is tasty.
Make Ahead and Storage
Storing Leftovers
Keep any leftover Heart Shaped Chocolate Thumbprint Cookies in an airtight container at room temperature for up to five days. This preserves their chewy texture and keeps the jam fresh without drying out the cookies.
Freezing
These cookies freeze wonderfully! Place them in a single layer on a baking sheet and freeze until firm, then transfer to a freezer-safe bag or container for up to three months. Thaw at room temperature when you’re ready to enjoy.
Reheating
If you want to enjoy them warm, pop your cookies in a preheated oven at 300°F (150°C) for about 5 minutes. This reawakens the flavors and gives the jam a delightful, melty goodness that’s hard to resist.
FAQs
Can I use a different type of jam for this recipe?
Absolutely! Feel free to experiment with any fruit jam you love, such as apricot, blackberry, or peach. Each will bring its own unique twist while keeping the cookie moist and flavorful.
Is it possible to make these cookies gluten-free?
You can substitute the all-purpose flour with a gluten-free flour blend, but it’s best if the blend contains xanthan gum or a similar binding agent to ensure the dough holds together well.
Can I make these cookies vegan?
Yes, with some swaps! Use vegan butter and a flax egg (1 tablespoon ground flaxseed mixed with 3 tablespoons water) instead of the regular egg. Also, check your jam ingredients to ensure they are pectin-based without animal products.
How do I prevent the jam from leaking during baking?
Use just the right amount of jam — about half a teaspoon per cookie. Too much jam can spill over, so be careful to fill the thumbprint just enough to hold a small pool without overflowing.
Can I make the dough ahead of time?
Definitely! The dough can be refrigerated for up to 24 hours before shaping and baking. This actually helps the flavors meld and can make shaping easier.
Final Thoughts
Baking the Heart Shaped Chocolate Thumbprint Cookies Recipe is a wonderful way to show love through homemade sweets, whether for holidays, special occasions, or just because. The blend of rich cocoa and vibrant jam is truly a joy to make and share. I hope you have as much fun baking and savoring these cookies as I do – they’re sure to become a treasured favorite in your recipe collection.
Print
Heart Shaped Chocolate Thumbprint Cookies Recipe
- Prep Time: 10 minutes
- Cook Time: 12 minutes
- Total Time: 22 minutes
- Yield: 18 servings
- Category: Dessert
- Method: Baking
- Cuisine: American
Description
These Heart Shaped Chocolate Thumbprint Cookies combine rich cocoa flavor with a sweet fruit jam center, perfect for a delightful treat. Soft and tender with a touch of fruity sweetness, these cookies are charming and easy to make, ideal for any occasion that calls for a personal and delicious dessert.
Ingredients
Dry Ingredients
- 1 ½ cups all-purpose flour
- ½ cup cocoa powder
- 1 teaspoon baking powder
- ¼ teaspoon salt
Wet Ingredients
- ½ cup unsalted butter (softened)
- ½ cup granulated sugar
- 1 large egg
- 1 teaspoon vanilla extract
- ¼ cup milk
Filling
- ¼ cup fruit jam (raspberry, strawberry, or your favorite flavor)
Instructions
- Preheat the oven: Preheat your oven to 350°F (175°C) and line a baking sheet with parchment paper to prevent sticking and ensure even baking.
- Mix dry ingredients: In a medium bowl, whisk together the all-purpose flour, cocoa powder, baking powder, and salt until well combined.
- Cream butter and sugar: In a separate bowl, cream the softened unsalted butter and granulated sugar together using a hand or stand mixer on medium speed until the mixture is light and fluffy, about 2-3 minutes.
- Add egg and vanilla: Beat in the large egg and vanilla extract until fully incorporated, creating a smooth, combined mixture.
- Combine dry and wet ingredients: Gradually add the dry ingredient mixture to the wet ingredients, mixing gently until just combined to avoid overworking the dough.
- Add milk and form dough: Stir in the milk until the dough comes together into a soft, workable consistency suitable for rolling.
- Shape cookies: Roll the dough into small balls roughly 1 inch in diameter and place them spaced evenly on the prepared baking sheet.
- Create thumbprints: Using your thumb or the back of a spoon, press a small indentation into the center of each dough ball to form a well for the jam filling.
- Fill with jam: Spoon about ½ teaspoon of your chosen fruit jam into each indentation, being careful not to overfill to prevent spilling during baking.
- Bake cookies: Bake in the preheated oven for 10-12 minutes, or until the cookies are firm to the touch and set around the edges but still soft in the center.
- Cool cookies: Allow the cookies to cool on the baking sheet for several minutes to firm up before transferring them to a wire rack to cool completely, ensuring they maintain their shape and texture.
Notes
- You can use any flavor of fruit jam you prefer for the filling, such as raspberry, strawberry, or apricot.
- Make sure the butter is softened to room temperature for easier creaming with sugar.
- Do not overmix the dough to keep the cookies tender and soft.
- If the dough is too sticky to handle, chill it in the refrigerator for 15-20 minutes before rolling.
- Store cookies in an airtight container at room temperature for up to one week.
- For a decorative touch, dust the cooled cookies lightly with powdered sugar.


