
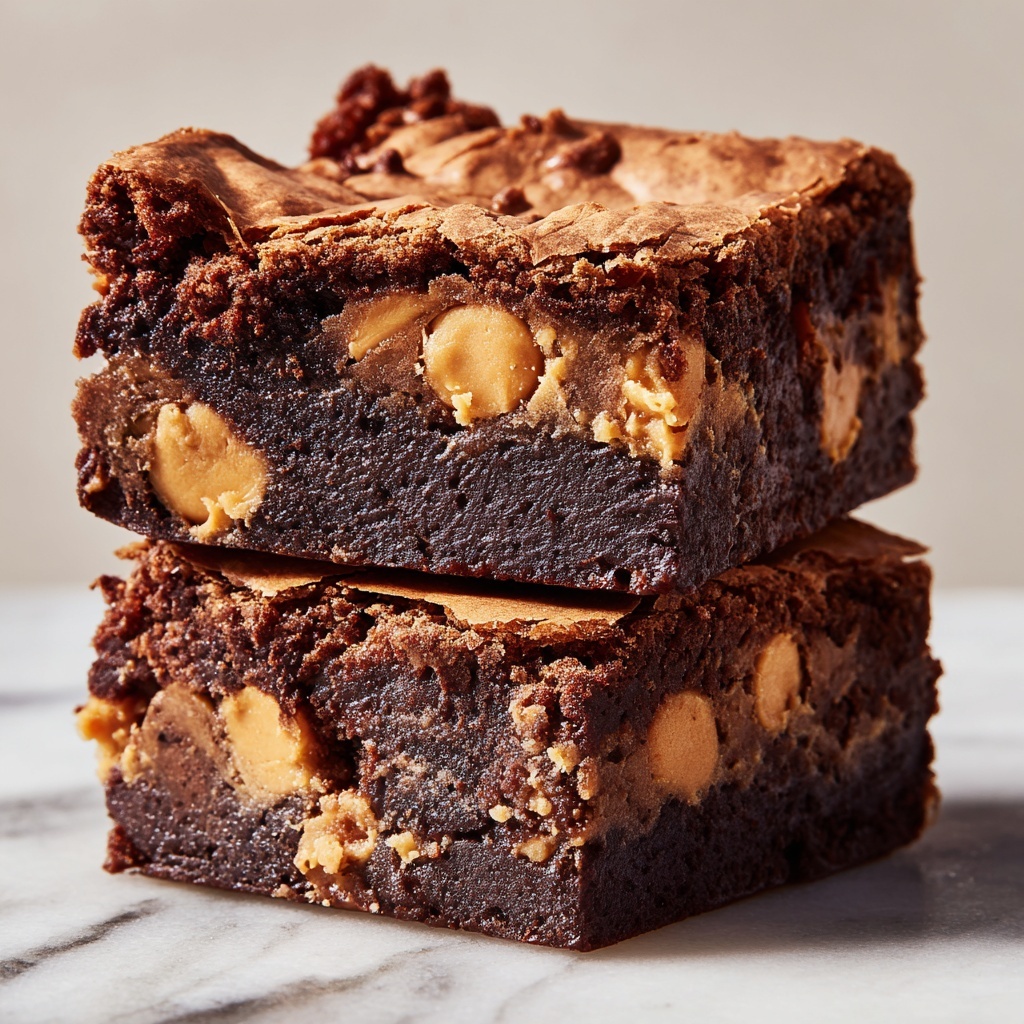
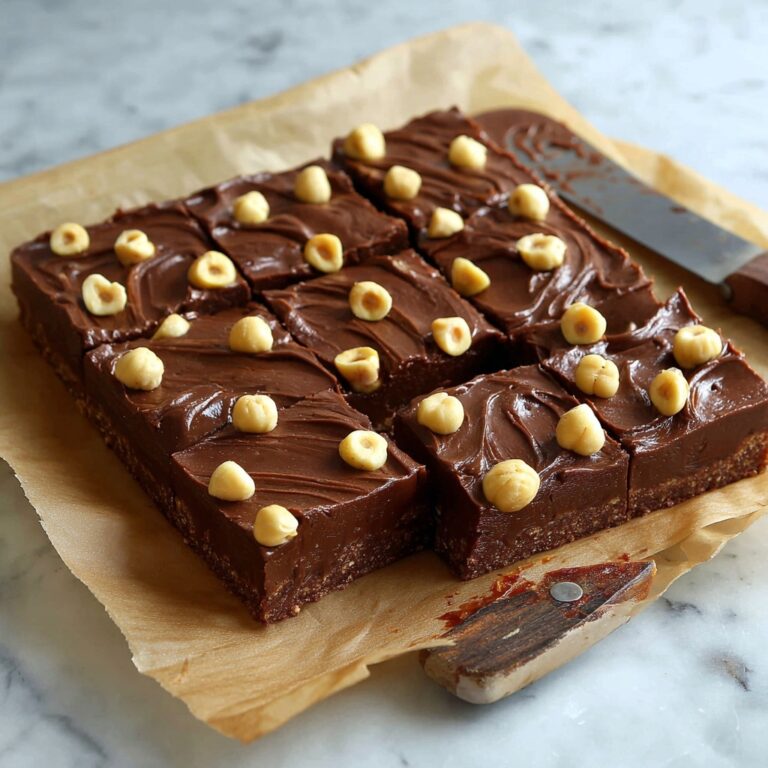
If you’re a fan of rich, decadent desserts that combine two crowd-pleasing flavors, you are in for a treat with this Fudgy Peanut Butter Brownies Recipe. These brownies strike the perfect balance between intense chocolate and creamy peanut butter, resulting in a tender, melt-in-your-mouth texture that feels indulgent yet incredibly satisfying. Whether you’re baking for a special occasion or simply craving a sweet pick-me-up, this recipe will quickly become a beloved favorite in your baking repertoire.
Ingredients You’ll Need
Gathering your ingredients is the first exciting step on the journey to deliciousness. Each simple component plays a vital role in crafting the gooey texture, rich flavor, and irresistible appearance of this classic treat.
- 1 cup unsalted butter: Provides the buttery richness and tender crumb that make these brownies so moist.
- 2 cups granulated sugar: Sweetens the brownies perfectly and contributes to their fudgy texture.
- 4 large eggs: Adds structure and helps bind all the ingredients together smoothly.
- 1 cup all-purpose flour: Gives the brownies their body without making them cakey.
- 1 cup unsweetened cocoa powder: Delivers that deep, intense chocolate flavor that’s essential.
- 1/2 teaspoon salt: Enhances the chocolate’s richness and balances the sweetness.
- 1 teaspoon vanilla extract: Elevates all the flavors for a well-rounded taste.
- 1 cup peanut butter: Creates the luscious, creamy layer that perfectly complements the chocolate.
- 1/2 cup chocolate chips: Adds bursts of gooey chocolate in every bite.
- 1/2 cup peanut butter chips: Brings extra pockets of peanut buttery goodness on top.
How to Make Fudgy Peanut Butter Brownies Recipe
Step 1: Preheat and Prepare Your Pan
Begin by preheating your oven to 350°F (175°C). Proper oven temperature ensures even baking. Grease a 9×13 inch baking dish or line it with parchment paper to prevent sticking and make cleanup a breeze.
Step 2: Melt Butter and Mix in Sugar and Eggs
In a medium saucepan over low heat, melt the unsalted butter gently. Once melted, remove from heat and stir in the granulated sugar for a smooth consistency. Add the eggs one at a time, beating well after each addition to create a creamy, glossy base for your brownies.
Step 3: Add Vanilla Extract
Stir in the vanilla extract. This simple step deepens the flavor, making the chocolate and peanut butter even more aromatic and inviting.
Step 4: Combine Dry Ingredients
In a separate bowl, whisk together the all-purpose flour, unsweetened cocoa powder, and salt. Gradually fold these dry ingredients into the butter mixture, mixing gently until just combined. Overmixing here could lead to tougher brownies, so be gentle!
Step 5: Layer Brownie Batter and Peanut Butter
Pour half of your brownie batter into the prepared baking dish and spread it evenly. In a microwave-safe bowl, warm the peanut butter for about 20-30 seconds so it’s easy to spread. Smooth the peanut butter layer over the batter, creating that luscious, creamy swirl that everyone loves.
Step 6: Add Remaining Batter and Toppings
Pour the remaining brownie batter over the peanut butter layer, spreading it carefully to fully cover it. Sprinkle chocolate chips and peanut butter chips over the top. These add extra bursts of flavor and a delightful texture contrast once baked.
Step 7: Bake and Cool
Bake for 30-35 minutes, or until a toothpick inserted in the center comes out with a few moist crumbs—this keeps the brownies fudgy rather than dry. Allow the brownies to cool completely in the pan before cutting. This cooling step is crucial to achieve clean cuts and the best texture.
How to Serve Fudgy Peanut Butter Brownies Recipe

Garnishes
A dusting of powdered sugar or a drizzle of melted chocolate adds a pretty finishing touch. For an extra indulgent twist, sprinkle chopped roasted peanuts or a few mini peanut butter cups on top before serving.
Side Dishes
Serve these brownies alongside a scoop of creamy vanilla ice cream or a dollop of whipped cream to make your dessert feel even more special. Fresh berries can also provide a refreshing contrast to the richness.
Creative Ways to Present
Cut the brownies into bite-sized squares and serve them on decorative platters for parties, or layer them with whipped cream and chocolate shavings in a clear glass for a show-stopping brownie parfait. They’re fun to personalize and perfect for sharing!
Make Ahead and Storage
Storing Leftovers
Leftover brownies can be stored in an airtight container at room temperature for up to 3 days, or refrigerated for about a week to keep them fresh longer. This recipe is sturdy enough to handle short-term storage without losing that fudgy texture.
Freezing
To freeze, wrap the cooled brownies tightly in plastic wrap and then foil for up to 3 months. When you’re ready to enjoy them, thaw overnight in the refrigerator for the best consistency and flavor retention.
Reheating
Warm your brownies gently in the microwave for 15-20 seconds to revive their softness and melt the chocolate chips slightly, bringing back that irresistible gooeyness that makes this Fudgy Peanut Butter Brownies Recipe so beloved.
FAQs
Can I use crunchy peanut butter instead of smooth?
Absolutely! Using crunchy peanut butter will add a delightful texture contrast inside the brownies but may make spreading the peanut butter layer a bit more challenging. Just warm it gently to help ease the process.
Are these brownies gluten-free?
Traditional all-purpose flour is used in this recipe, so the brownies are not gluten-free as written. However, you can substitute a gluten-free flour blend, making sure it’s suitable for baking, to enjoy a gluten-free version.
Can I substitute the sugar with a healthier alternative?
While granulated sugar creates that classic fudgy texture and sweetness, you can experiment with alternatives like coconut sugar or a sugar substitute. Keep in mind that texture and flavor may differ slightly with substitutions.
What is the best way to get clean cuts when slicing?
To get neat brownies without crumbly edges, ensure the brownies are completely cooled before slicing. Using a sharp knife warmed under hot water and dried before each cut helps create smooth, clean slices.
Can I double this recipe for a larger batch?
Yes, you can double the ingredients and bake in a larger pan, adjusting the baking time slightly. Keep an eye on them and use a toothpick test to ensure they stay perfectly fudgy.
Final Thoughts
This Fudgy Peanut Butter Brownies Recipe is a glorious celebration of two beloved flavors working in perfect harmony. Once you try these brownies you’ll love how easy they are to make and how utterly irresistible they taste. Go ahead, bake a batch and watch smiles light up the room as everyone enjoys each gooey, chocolatey bite with that creamy peanut butter surprise!
Print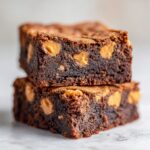
Fudgy Peanut Butter Brownies Recipe
- Prep Time: 20 minutes
- Cook Time: 35 minutes
- Total Time: 55 minutes
- Yield: 12 servings
- Category: Dessert
- Method: Baking
- Cuisine: American
Description
These fudgy peanut butter brownies combine rich chocolate flavor with creamy peanut butter swirls and a mix of chocolate and peanut butter chips, resulting in a decadent and chewy treat perfect for any chocolate and peanut butter lover.
Ingredients
Brownie Batter
- 1 cup unsalted butter
- 2 cups granulated sugar
- 4 large eggs
- 1 cup all-purpose flour
- 1 cup unsweetened cocoa powder
- 1/2 teaspoon salt
- 1 teaspoon vanilla extract
Peanut Butter Layer and Toppings
- 1 cup peanut butter
- 1/2 cup chocolate chips
- 1/2 cup peanut butter chips
Instructions
- Preheat oven: Preheat your oven to 350°F (175°C). Grease a 9×13 inch baking dish or line it with parchment paper to prevent sticking.
- Melt butter and sugar: In a medium saucepan, melt the butter over low heat. Remove from heat and immediately stir in the granulated sugar. Add the eggs one at a time, beating well after each addition to ensure a smooth mixture.
- Add flavoring: Stir in the vanilla extract to enhance the taste of the batter.
- Combine dry ingredients: In a separate bowl, whisk together the all-purpose flour, unsweetened cocoa powder, and salt. Gradually add this dry mixture to the butter and sugar mixture, mixing just until combined to avoid overworking the batter.
- Layer brownie batter and peanut butter: Pour half of the brownie batter evenly into the prepared baking dish. In a microwave-safe bowl, soften the peanut butter by heating it for 20-30 seconds until spreadable. Spread the peanut butter layer evenly over the brownie batter.
- Add remaining batter and toppings: Pour the remaining brownie batter over the peanut butter layer and spread it evenly. Sprinkle chocolate chips and peanut butter chips over the top to add extra texture and flavor.
- Bake: Place the baking dish in the preheated oven and bake for 30-35 minutes, or until a toothpick inserted into the center comes out with a few moist crumbs. Avoid inserting the toothpick in the peanut butter layer for accurate doneness check.
- Cool and serve: Allow the brownies to cool completely in the pan before cutting into bars. This helps them set properly and makes for clean slices.
Notes
- Ensure the peanut butter is slightly warmed to spread easily without mixing too much into the brownie batter.
- Do not overmix the batter once dry ingredients are added to avoid tough brownies.
- Store leftover brownies in an airtight container at room temperature for up to 3 days or refrigerate for up to a week.
- For extra fudginess, slightly underbake the brownies but ensure the edges are set.
- You can substitute peanut butter chips with chopped peanuts for added crunch if desired.
