
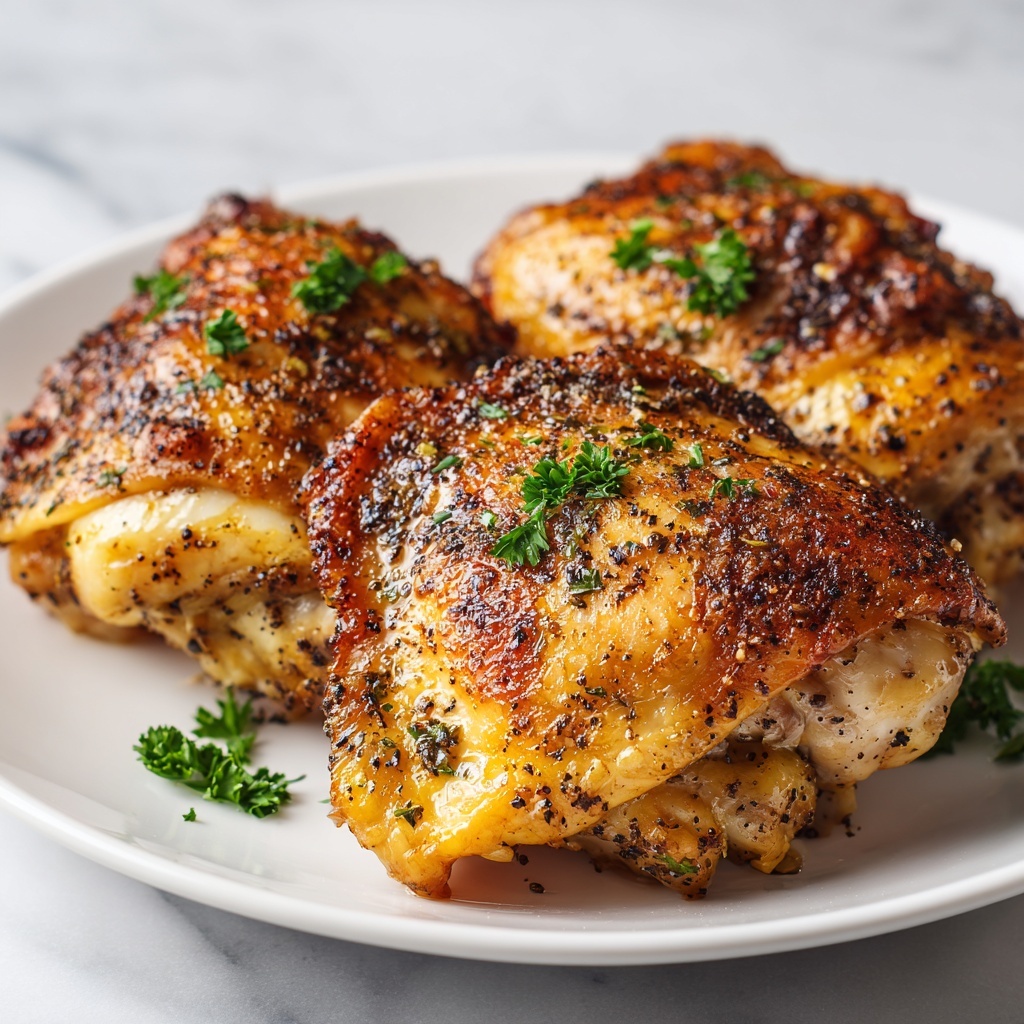
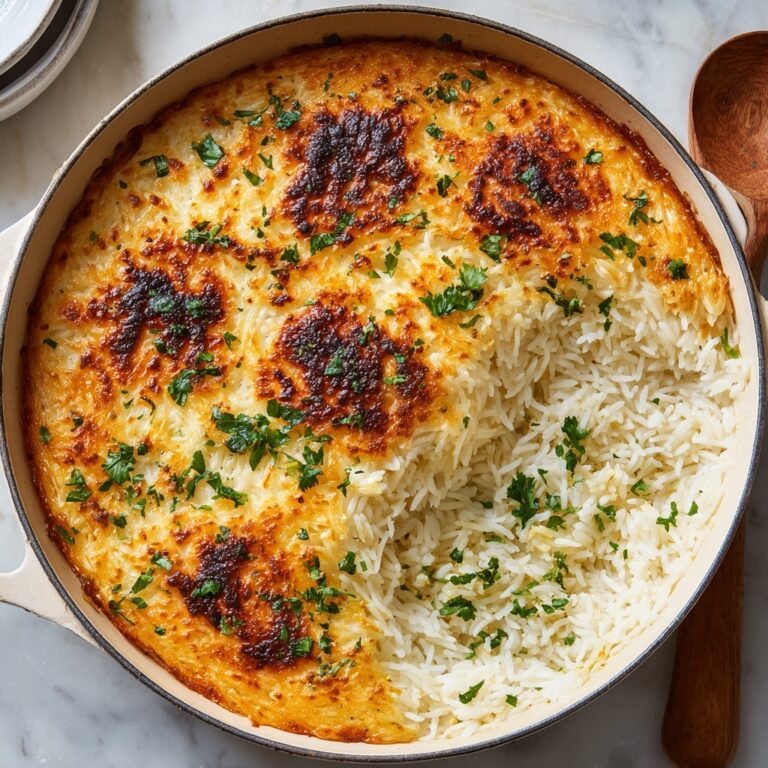
If you are craving a dish that’s bursting with flavor yet incredibly simple to prepare, then this Baked Ranch Chicken Recipe is about to become your new best friend in the kitchen. With a crispy coating infused with zesty ranch seasoning and a deliciously creamy Parmesan breadcrumb crust, every bite is a perfect harmony of textures and tastes. This recipe transforms basic chicken breasts into a show-stopping main that’s ideal for busy weeknights or casual weekend dinners. Trust me, once you try this, you’ll wonder how you ever lived without it!
Ingredients You’ll Need
Gathering the right ingredients is the first step to nailing this dish. Each component contributes something essential: ranch dressing mix adds that signature tang, breadcrumbs give a delightful crunch, and Parmesan cheese brings a rich, savory depth. Don’t overlook the mayonnaise—it’s the secret to keeping the chicken moist and ensuring the coating sticks perfectly.
- Ranch dressing mix: Provides the classic tangy and herby flavor that makes this recipe unmistakable.
- Breadcrumbs: Adds a crunchy texture that creates contrast against the tender chicken beneath.
- Freshly grated Parmesan cheese: Infuses the crust with a nutty, savory taste that elevates the dish.
- Boneless, skinless chicken breasts: The lean protein base that absorbs all the delicious seasonings.
- Mayonnaise: Keeps the chicken juicy while giving the breadcrumb mixture a sticky surface to cling to.
How to Make Baked Ranch Chicken Recipe
Step 1: Preheat and Prep Your Oven
Start by setting your oven to 375°F (190°C) so it reaches the perfect temperature for baking. Meanwhile, grab a 9×13 inch baking dish and give it a light coating of cooking spray. This step ensures your chicken won’t stick and makes the cleanup a breeze later on.
Step 2: Prepare the Coating Mixture
In a shallow dish, combine the ranch dressing mix, breadcrumbs, and freshly grated Parmesan cheese. Take your time mixing them well so every breadcrumb is evenly seasoned and ready to create that irresistible crust. In a separate shallow dish, place the mayonnaise. These two mixtures are your secret weapons to an unbeatable coating.
Step 3: Coat the Chicken
Now comes the fun part – coating your chicken breasts. Dredge each chicken piece first in the mayonnaise, ensuring it’s thoroughly covered, then press it into the breadcrumb mixture. This double layer locks in moisture and guarantees a crispy, flavorful exterior when baked. Place each coated breast carefully into your prepared baking dish, spacing them out slightly so they cook evenly.
Step 4: Bake to Perfection
Slide your baking dish into the oven and bake for about 40 minutes. How do you know it’s done? Use an instant-read thermometer to check that the thickest part of the chicken has reached 165°F (74°C). This step is crucial to ensure the chicken is safely cooked but still juicy and tender inside.
How to Serve Baked Ranch Chicken Recipe

Garnishes
A sprinkle of freshly chopped parsley or chives on top instantly brightens up the presentation and adds a pop of freshness. If you want to elevate it even more, a light drizzle of honey mustard or a side of ranch dressing can complement the flavors beautifully without overpowering them.
Side Dishes
This chicken pairs wonderfully with hearty sides such as roasted vegetables, creamy mashed potatoes, or a crisp green salad. For a lighter option, steamed asparagus or a colorful quinoa salad bring balance and texture to your meal. Whatever you choose, aim for sides that support the rich, savory ranch flavors without competing with them.
Creative Ways to Present
If you’re feeling adventurous, slice the baked ranch chicken and serve it atop a bed of mixed greens or stuff it into warm tortillas to make ranch chicken wraps. Another fun idea is to serve the chicken alongside a grain bowl with avocado and roasted corn for a modern twist that’s both satisfying and visually appealing.
Make Ahead and Storage
Storing Leftovers
Place any leftover baked ranch chicken in an airtight container and store it in the refrigerator. It will stay fresh for up to three days, making it perfect for quick lunches or dinner on the go.
Freezing
If you want to keep your chicken longer, freeze it in a freezer-safe container or bag. This recipe freezes well for up to two months. Just be sure to separate the chicken pieces with parchment paper to avoid sticking together.
Reheating
Reheat leftovers in the oven at 350°F (175°C) for about 10-15 minutes to maintain that crispy coating. Avoid microwaving if possible, as it can make the crust soggy. Alternatively, a quick reheat in a skillet over medium heat also works wonders for restoring the crunchiness.
FAQs
Can I use chicken thighs instead of breasts?
Absolutely! Chicken thighs will add a bit more richness and stay juicy, but keep in mind they might need slight adjustments in cooking time because they’re thicker or vary in size.
Is there a homemade alternative for ranch dressing mix?
Yes, you can easily make your own by mixing dried herbs like dill, parsley, garlic powder, onion powder, and paprika with a bit of salt and pepper. This DIY approach allows you to customize the seasoning to your liking.
Can I make this recipe dairy-free?
To make it dairy-free, swap Parmesan with a dairy-free cheese substitute or nutritional yeast, and use a dairy-free mayonnaise. The flavor might be slightly different but still delicious.
What if I don’t have mayonnaise?
You can substitute mayonnaise with Greek yogurt or even mustard for a tangier profile. Just be sure to use a thicker option so the coating mixture sticks properly.
Can I prepare this recipe in advance before baking?
Yes, you can coat the chicken and keep it covered in the refrigerator for a few hours before baking. This makes it a convenient option for busy days or meal prepping.
Final Thoughts
This Baked Ranch Chicken Recipe is one of those rare dishes that feels like a warm hug while still being easy enough for any home cook to master. It balances crispy, creamy, and flavorful elements in a way that keeps everyone at the table smiling for more. Don’t hesitate to give it a try—once it’s on your recipe rotation, you’ll find yourself reaching for it time and time again.
Print
Baked Ranch Chicken Recipe
- Prep Time: 10 minutes
- Cook Time: 40 minutes
- Total Time: 50 minutes
- Yield: 4 servings
- Category: Main Course
- Method: Baking
- Cuisine: American
Description
This Baked Ranch Chicken recipe features juicy, tender chicken breasts coated in a flavorful mixture of ranch dressing mix, breadcrumbs, and Parmesan cheese. It’s a simple yet delicious meal that’s baked to perfection in under an hour, making it perfect for busy weeknights or casual dinners.
Ingredients
For the Coating
- 1 ounce ranch dressing mix
- ½ cup breadcrumbs
- ½ cup freshly grated Parmesan cheese
For the Chicken
- 4 boneless, skinless chicken breasts
- ½ cup mayonnaise
Instructions
- Preheat and Prep: Preheat your oven to 375°F (190°C) and grease a 9×13 inch baking dish thoroughly using cooking spray to prevent sticking.
- Prepare Coating: In a shallow dish, mix together the ranch dressing mix, breadcrumbs, and freshly grated Parmesan cheese. In a separate shallow dish, pour the mayonnaise for coating the chicken.
- Coat Chicken: Take each boneless, skinless chicken breast and thoroughly dredge it in the mayonnaise to ensure an even layer. Then, coat the chicken breast in the breadcrumb mixture, gently pressing the coating to adhere well.
- Arrange and Bake: Place the coated chicken breasts evenly in the prepared baking dish. Bake in the preheated oven for 40 minutes or until an instant-read thermometer inserted into the thickest part of the chicken registers 165°F (74°C), ensuring it is fully cooked and safe to eat.
Notes
- For extra crispiness, you can broil the chicken for an additional 2-3 minutes after baking, but watch closely to prevent burning.
- Using freshly grated Parmesan cheese yields better flavor and texture compared to pre-grated types.
- Make sure the chicken breasts are of even thickness to ensure uniform cooking; you can pound them lightly if needed.
- Leftover chicken can be stored in an airtight container in the refrigerator for up to 3 days.


