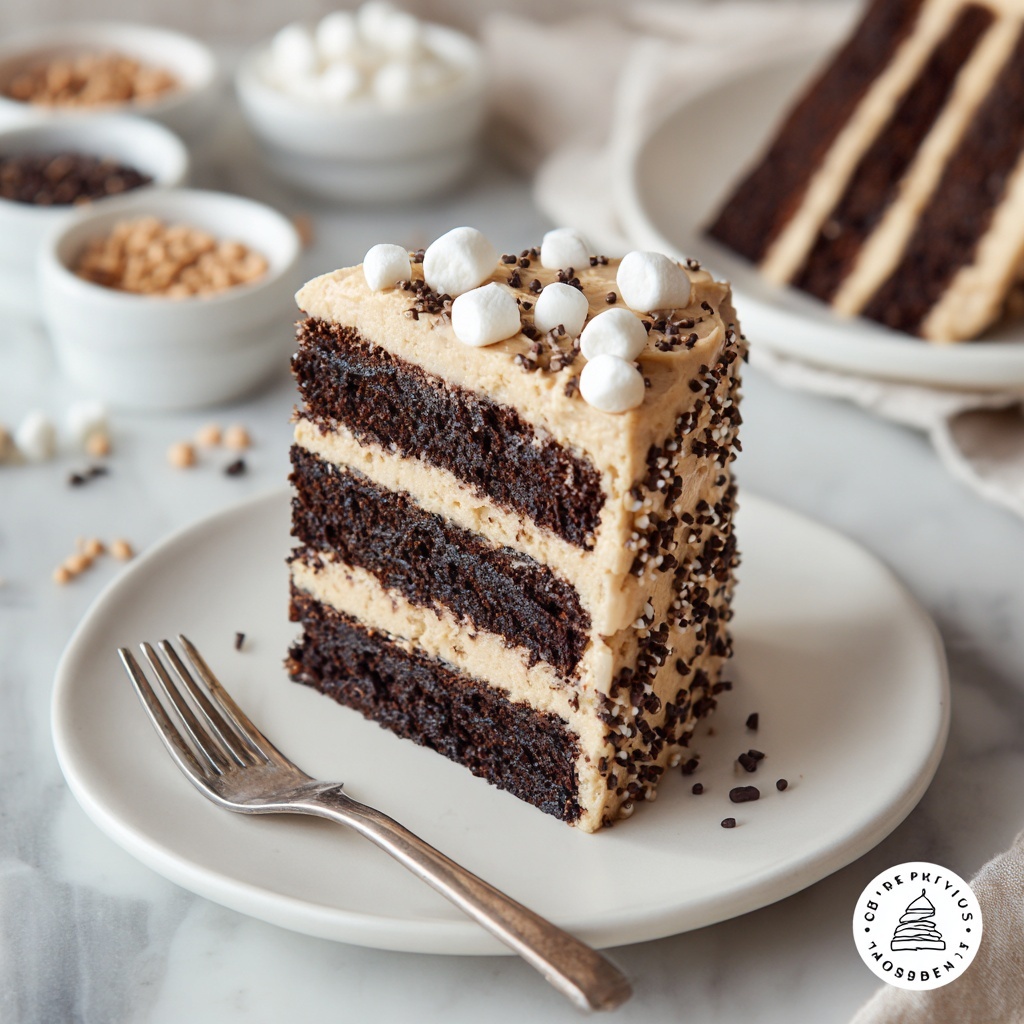
If you’re searching for a dessert that’s indulgent, comforting, and incredibly easy to prepare, the Hot Chocolate Icebox Cake Recipe is going to become your new best friend. Imagine layers of rich chocolate graham crackers sandwiched with a velvety hot cocoa cream that blends fluffy whipped cream, smooth cream cheese, and gooey marshmallow creme—all infused with that irresistible warmth of hot cocoa mix. The cake chills into a soft, luscious dream of chocolate goodness that melts in your mouth with every bite. Whether it’s a chilly evening treat or a crowd-pleasing party dessert, this hot chocolate icebox cake is a delicious way to bring cozy vibes and smiles to any table.
Ingredients You’ll Need
These ingredients are simple, yet each plays a crucial role in delivering that silky texture, deep chocolate flavor, and smooth creaminess that make this cake unforgettable. From the chocolate graham crackers providing a sturdy yet tender base to the marshmallow creme lending a sweet fluffiness, every component elevates the Hot Chocolate Icebox Cake Recipe.
- Chocolate graham crackers: The perfect chocolate-flavored layers that soften beautifully when chilled to create cake-like texture.
- Cold heavy cream: Whipped to stiff peaks, it adds lightness and body to the creamy filling.
- Marshmallow creme: Adds sweetness and that iconic marshmallow fluff creaminess to the filling.
- Cream cheese (softened): Brings a subtle tanginess and richness that balances the sweetness perfectly.
- Vanilla extract: Enhances all the flavors with its warm, aromatic notes.
- Powdered sugar: Sweetens the mixture smoothly without graininess.
- Hot cocoa mix (3–4 packets): Infuses the filling with deep, chocolaty warmth reminiscent of your favorite hot chocolate drink.
- Chocolate sprinkles and mini marshmallows: Fun garnishes that add a delightful crunch and extra marshmallowy charm on top.
How to Make Hot Chocolate Icebox Cake Recipe
Step 1: Prepare the Hot Cocoa Cream Mixture
Start by whipping the cold heavy cream using a stand mixer or electric hand mixer until stiff peaks form. This fluffy whipped cream is the base for your luscious filling, giving it that airy texture you’ll love. Set it aside carefully to avoid deflating.
Step 2: Make The Cream Cheese Mixture
In a large bowl, beat the softened cream cheese, powdered sugar, and vanilla extract at medium-high speed until the mixture becomes smooth and creamy. This step is key for getting rid of lumps and building that dreamy, velvety base for your filling.
Step 3: Add Marshmallow Creme and Hot Cocoa Mix
Next, incorporate the marshmallow creme into the cream cheese mix, beating until fully combined. Then, add 3-4 packets of your favorite hot cocoa mix and mix again until everything is smooth and perfectly merged. Your filling is starting to come alive with that rich chocolate flavor!
Step 4: Combine the Whipped Cream
Gently fold about 2-3 cups of the whipped cream into the cocoa mixture on low speed to lighten the texture. Finish by carefully folding in the remaining whipped cream by hand, making sure not to deflate the airy whipped cream. The result is a luxuriously soft and fluffy chocolate cream.
Step 5: Assemble the Icebox Cake
Begin by spreading a very thin layer (around 3-4 tablespoons) of the hot cocoa cream on the bottom of a 9×13 inch pan. Lay down a single layer of chocolate graham crackers, breaking them as needed to cover the base. This will create the first foundation layer, setting the stage for those creamy layers to shine.
Step 6: Layering the Cake
Spread approximately 2 ½ cups of the creamy hot cocoa mixture evenly over the graham crackers. Add another layer of chocolate graham crackers on top, then spread another 2 ½ cups of the cream mixture. Repeat with a final graham cracker layer, then cover this with the remainder of the hot cocoa cream. These layers work harmoniously to soften the crackers and meld flavors as the cake chills.
Step 7: Chill and Set
Cover the cake and chill it for at least 4-5 hours. For best results, refrigerate overnight so the graham crackers absorb the moisture and become soft and cake-like. The chilling time transforms this no-bake dessert into a decadently soft and sliceable treat.
Step 8: Slice and Serve
For smoother slicing, freeze the assembled cake for about 30 minutes before serving. Dip a sharp knife in hot water, wipe it clean, and slice carefully—wiping the knife between cuts helps create neater slices. Use a thin spatula to serve, and prepare for some deliciously messy fun. Garnish with chocolate sprinkles and mini marshmallows right before serving to add texture and extra charm.
How to Serve Hot Chocolate Icebox Cake Recipe

Garnishes
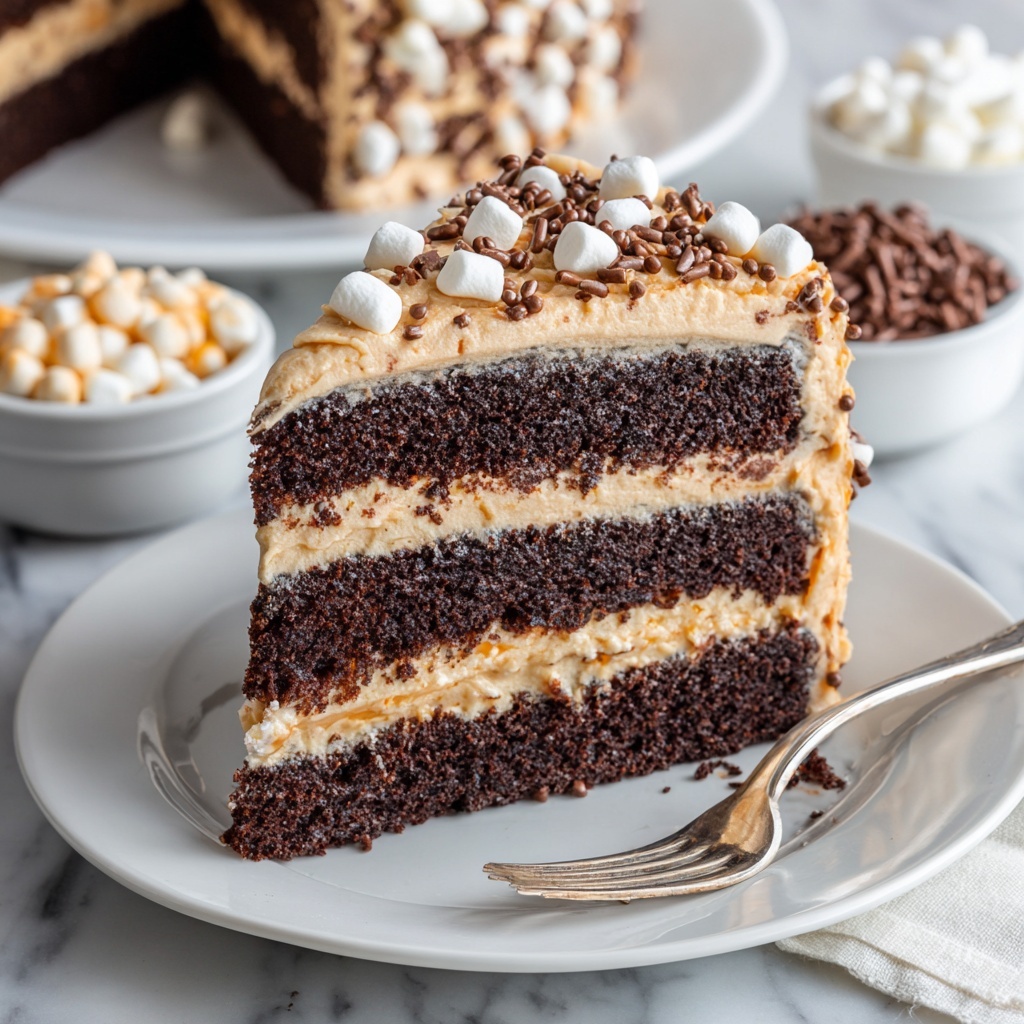
Top your Icebox Cake with playful chocolate sprinkles and mini marshmallows to enhance its visual appeal and add delightful contrasting textures. Freshly shaved chocolate or a drizzle of chocolate syrup is also a fantastic way to amp up the chocolate factor. These simple touches make your cake look just as irresistible as it tastes.
Side Dishes
This cake pairs beautifully with a hot cup of coffee or, naturally, a steaming mug of hot chocolate to complement the flavors. For an added fresh note, serve with lightly toasted nuts or a crisp berry salad to balance the cake’s richness with some bright, acidic contrast.
Creative Ways to Present
Try serving your Hot Chocolate Icebox Cake Recipe in individual glass parfaits layered with crumbled graham crackers and extra marshmallows for an elegant twist. Or assemble mini versions in ramekins to make a charming personal dessert. No matter the presentation, this cake will delight and impress everyone at your table.
Make Ahead and Storage
Storing Leftovers
Keep leftovers stored in an airtight container in the refrigerator, and they will stay fresh for 3 to 4 days. The flavors actually deepen over time, so it tastes even better the next day. Just be sure to keep it well covered to maintain that light, creamy texture.
Freezing
If you want to extend the lifespan of your cake, you can freeze portions for up to a month. Wrap individual slices tightly in plastic wrap and then place them in a freezer-safe container. Thaw in the refrigerator overnight before serving to restore the perfect creamy consistency.
Reheating
This icebox cake is best enjoyed chilled and does not require reheating. Warming it up risks melting the luscious cream layers and losing the lovely texture that makes this dessert so special. Simply serve cold or at room temperature after thawing.
FAQs
Can I use regular graham crackers instead of chocolate graham crackers?
Absolutely! Regular graham crackers will work just fine, but using chocolate ones adds a deeper cocoa flavor that makes the dessert extra indulgent. Feel free to experiment to suit your taste preferences.
Is this cake gluten-free?
Traditional graham crackers contain gluten, so this cake is not gluten-free. However, you can find gluten-free chocolate graham crackers or cookies to substitute and still enjoy the same delicious taste and texture.
How long does it take for the cake to set properly?
While 4-5 hours of chilling will soften the graham crackers enough to slice, we recommend refrigerating the cake overnight for the best texture and flavor development. This extra time allows the layers to meld beautifully.
Can I make this cake vegan or dairy-free?
With some ingredient swaps like coconut cream for heavy cream, vegan cream cheese alternatives, and dairy-free marshmallow fluff, you can create a vegan or dairy-free version. Just keep in mind the texture and flavor might differ slightly from the classic version.
What’s the best way to slice and serve this cake neatly?
After chilling, freeze the cake for about 30 minutes to firm up the layers. Use a sharp knife dipped in hot water, wiping it clean between each cut. This method ensures smooth slices and minimal crumbling for a beautiful presentation.
Final Thoughts
This Hot Chocolate Icebox Cake Recipe is such a cozy, crowd-pleasing dessert that feels like a warm hug in cake form. It’s simple enough to whip up on a busy day yet stunning enough to impress guests at your next gathering. I can’t wait for you to try it and enjoy every creamy, chocolaty bite as much as I do. Happy baking and chilly weather indulging!
Print
Hot Chocolate Icebox Cake Recipe
- Prep Time: 20 minutes
- Cook Time: 0 minutes
- Total Time: 4 hours 20 minutes (minimum chilling time)
- Yield: 15 servings
- Category: Dessert
- Method: No-Cook
- Cuisine: American
Description
This Hot Chocolate Icebox Cake is a luscious no-bake dessert perfect for chocolate lovers. Layers of chocolate graham crackers alternate with a creamy, fluffy hot cocoa infused mixture made from whipped heavy cream, cream cheese, marshmallow creme, and hot cocoa mix. Chilled until the graham crackers soften, this cake yields a rich, mousse-like texture with delightful chocolate and marshmallow flavors, topped with chocolate sprinkles and mini marshmallows for a festive touch.
Ingredients
Base Ingredients
- 1 (14.4 oz) box chocolate graham crackers
Cream Mixture Ingredients
- 3 ½ cups cold heavy cream
- 1 cup marshmallow creme
- 8 oz block cream cheese, softened
- 1 ½ tsp vanilla extract
- ¼ cup powdered sugar
- ¾ – 1 cup (3–4 packets) hot cocoa mix
Garnish
- Chocolate sprinkles
- Mini marshmallows
Instructions
- Prepare the Hot Cocoa Cream Mixture: Using a stand mixer with a whisk attachment or an electric hand mixer, beat the cold heavy cream until stiff peaks begin to form. Transfer the whipped cream to a separate bowl if using an electric mixer or set mixing bowl aside.
- Mix Cream Cheese and Sweeteners: Add the cream cheese, vanilla extract, and powdered sugar to a large bowl. Beat on medium-high speed until smooth and creamy. Add the marshmallow creme and beat to incorporate thoroughly.
- Incorporate Hot Cocoa Mix: Add the hot cocoa mix to the cream cheese mixture and beat until fully smooth and incorporated.
- Combine Whipped Cream: Add about 2-3 cups of the whipped cream to the hot cocoa mixture and beat on low speed to combine. Then, gently fold in the remaining whipped cream, being careful not to deflate it, until the mixture is uniform with no visible white streaks.
- Assemble the Icebox Cake: Spread a very thin layer (about 3-4 tablespoons) of the hot cocoa cream mixture on the bottom of a 9×13 inch pan. Arrange a single layer of chocolate graham crackers atop, breaking crackers as needed to evenly cover the surface—usually 7-8 per layer.
- Layer the Cream and Crackers: Spread approximately 2 ½ cups of the creamy hot cocoa mixture evenly over the graham crackers. Add another layer of graham crackers to cover the cream layer. Repeat spreading a second layer of about 2 ½ cups of the hot cocoa mixture, cover with the final graham cracker layer, and then spread the remaining hot cocoa cream over the top.
- Chill the Cake: Refrigerate the assembled cake for at least 4-5 hours until the graham crackers soften enough to cut through easily. For best results, chill overnight (about 12 hours) for a more cake-like texture.
- Serve and Store: Before serving, optionally freeze the cake for about 30 minutes for easier slicing. To slice, run a sharp knife under hot water, wipe clean each time, and use a thin metal spatula to lift slices. Garnish with chocolate sprinkles and mini marshmallows. Store leftovers in the refrigerator for 3-4 days.
Notes
- For best texture, chill the icebox cake overnight to allow graham crackers to soften thoroughly.
- Freezing the cake for 30 minutes before slicing makes cutting cleaner and easier.
- Use a sharp knife warmed under hot water and wiped clean between cuts to prevent sticking.
- Refrigerate leftovers and consume within 3-4 days for best flavor and texture.
- Breaking the graham crackers to fill gaps ensures even layering and better presentation.

