
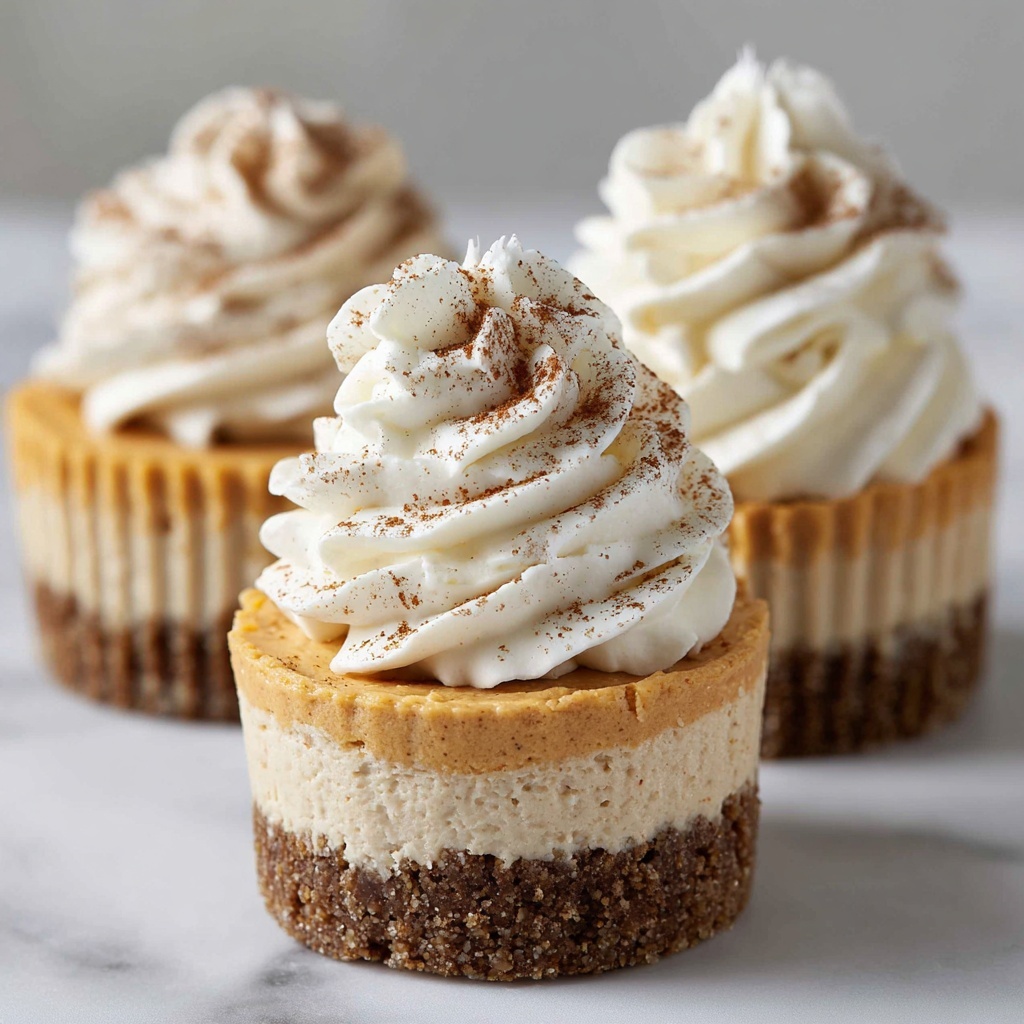
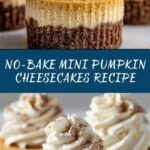
If you are craving a dessert that captures all the cozy flavors of fall without turning on your oven, then you are going to absolutely fall in love with this No-Bake Mini Pumpkin Cheesecakes Recipe. These little delights are perfectly sized for a sweet treat that feels indulgent but not overwhelming. The creamy, spiced pumpkin filling nestled on a buttery graham cracker crust makes every bite a little cup of autumn magic. Whether you’re entertaining guests or just sneaking a treat for yourself, this recipe is simple, satisfying, and sure to be your go-to pumpkin dessert all season long.
Ingredients You’ll Need
Every ingredient in this No-Bake Mini Pumpkin Cheesecakes Recipe is thoughtfully chosen to bring out the best in texture, flavor, and that nostalgic pumpkin spice vibe. These essentials come together quickly but shine bright in the final product, balancing creamy sweetness with a hint of fall warmth.
- Graham cracker crumbs: Provide the buttery, crunchy base that perfectly complements the smooth filling.
- Melted butter: Binds the crumbs together and adds richness to the crust.
- Brown sugar: Adds warmth and a slight caramel note to the crust.
- Cream cheese (softened): The star of the filling, giving a creamy, tangy texture that blends beautifully with pumpkin.
- Canned pumpkin puree: Brings the pumpkin flavor and moisture to keep the filling luscious.
- Powdered sugar: Sweetens the filling without any grit.
- Pumpkin pie spice: A perfect blend of cinnamon, nutmeg, and cloves to awaken those cozy fall senses.
- Vanilla extract: Enhances the flavor layers and adds warmth.
- Whipped topping or whipped cream: Lightens the filling making it fluffy and smooth, plus a topping option for garnish.
How to Make No-Bake Mini Pumpkin Cheesecakes Recipe
Step 1: Prepare the crust
Start by mixing the graham cracker crumbs, melted butter, and brown sugar in a medium bowl until everything is well combined and holds together when pressed. Then, divide this mixture evenly into 12 lined muffin cups. Press the crumbs firmly into the bottom to form an even, sturdy crust that will hold up under the creamy filling. This step sets the foundation, so don’t rush the pressing—it makes all the difference in texture.
Step 2: Make the pumpkin cheesecake filling
In a separate bowl, beat the softened cream cheese until it’s totally smooth — no lumps here! Adding the cream cheese at room temperature really helps achieve that silky texture. Next, mix in the pumpkin puree, powdered sugar, pumpkin pie spice, and vanilla extract, stirring until everything is fully blended into a luscious, spiced pumpkin batter.
Step 3: Fold in the whipped topping
Gently fold in the whipped topping or whipped cream to the pumpkin mixture. This step is key to lightening up the dense cream cheese and pumpkin mix, giving your cheesecake that delightful fluffy feel. Be careful not to overmix or you’ll lose the airiness that makes these mini cheesecakes so irresistible.
Step 4: Assemble and chill
Spoon the fluffy filling over each graham cracker crust, smoothing the tops for a clean, polished look. Place the mini cheesecakes in the refrigerator and chill for at least 3 hours to set. This chill time allows the flavors to meld and the texture to firm up just right, so patience is definitely rewarded here.
How to Serve No-Bake Mini Pumpkin Cheesecakes Recipe
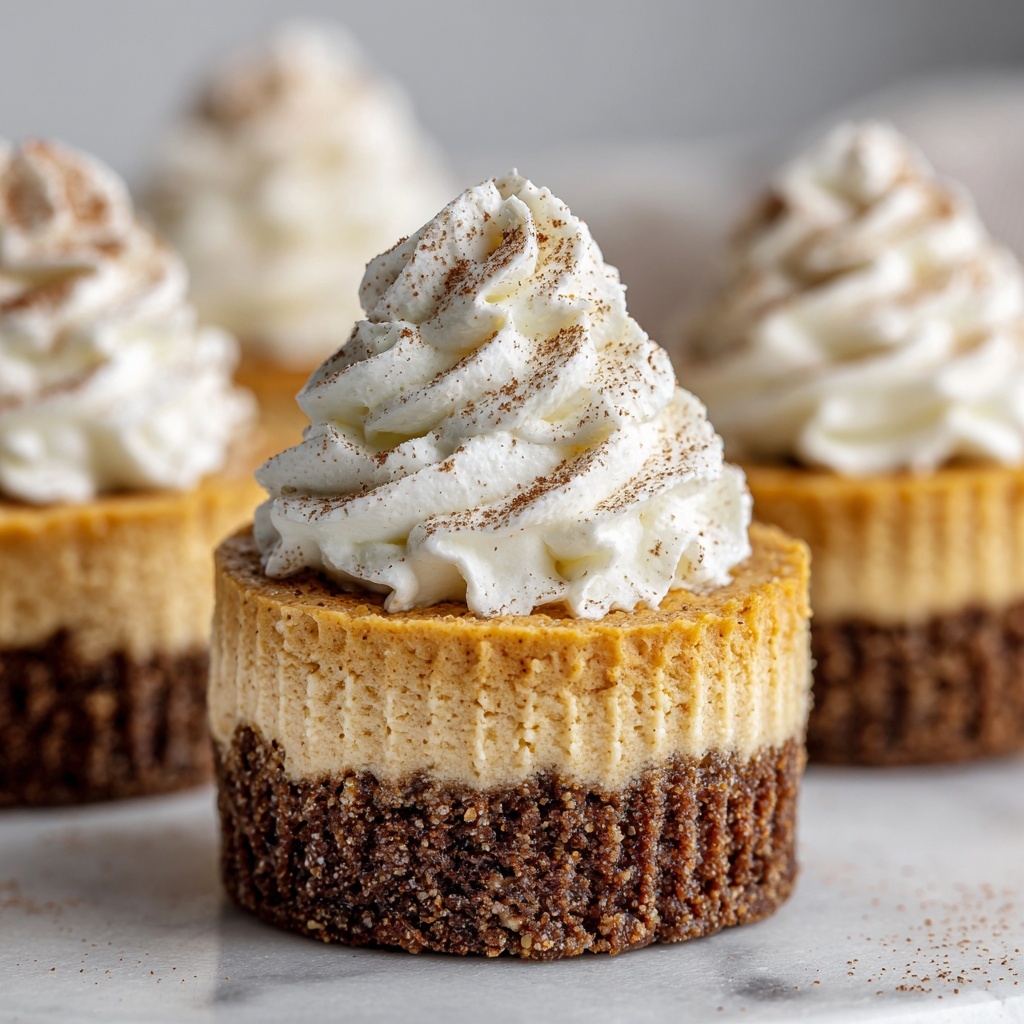
Garnishes
The classic way to finish these mini delights is with a generous dollop of whipped cream on top and a light dusting of pumpkin pie spice or cinnamon. You could also sprinkle some finely chopped pecans or drizzle a bit of caramel sauce if you’re feeling fancy. These little extras not only add eye appeal but introduce delightful textural contrast and extra flavor.
Side Dishes
Since these cheesecakes are already sweet and creamy, they pair wonderfully with a cup of hot chai tea or a lightly spiced latte. You can also serve them alongside fresh autumn fruits like sliced apples or pears for a fresh, juicy counterpoint. For a heartier spread, pumpkin-spiced cookies or gingerbread bites make charming companions.
Creative Ways to Present
If you want to impress guests, consider serving the mini cheesecakes in decorative glass jars for a rustic look. Layer the crust, filling, and garnish beautifully visible through the glass. Alternatively, place each cheesecake on a pretty dessert plate with a drizzle of chocolate or caramel sauce swirling around it. Little tricks like these make dessert feel extra special without extra effort.
Make Ahead and Storage
Storing Leftovers
After enjoying some of these little pumpkin delights, store any leftovers in an airtight container in the refrigerator. They will keep wonderfully for about 3 to 4 days, maintaining both flavor and texture. Just be sure to keep them chilled so the creamy filling doesn’t lose its shape or turn watery.
Freezing
If you want to prep well ahead, these mini pumpkin cheesecakes freeze beautifully. Place them in a single layer on a baking sheet to freeze individually, then transfer to a freezer-safe container or bag for up to a month. When you’re ready to enjoy, thaw them overnight in the refrigerator to preserve that silky texture.
Reheating
Since this recipe is best served chilled, reheating is not recommended. Instead, simply thaw frozen cheesecakes in the fridge and serve cold, just like fresh. If you prefer a slightly softer texture, remove them from the fridge 15 minutes before serving to take the chill off but avoid melting the filling.
FAQs
Can I use a different crust?
Absolutely! While graham cracker crust is classic and delicious, you can substitute gingersnap crumbs for a spicier twist or even crushed digestive biscuits if you prefer. Just melt the butter accordingly to bind the crumbs well.
Is there a dairy-free option?
Yes, you can make this No-Bake Mini Pumpkin Cheesecakes Recipe dairy-free by using vegan cream cheese and a plant-based whipped topping. They set up just as well and taste equally heavenly!
How long do I need to chill these cheesecakes?
Chilling for at least 3 hours is essential to allow the filling to firm up properly. If you can leave them overnight, that’s even better for maximum flavor meld and texture.
Can I make these mini cheesecakes larger?
Definitely. If you’d like bigger portions, you can double the filling and crust ingredients to fill a standard-sized springform pan for one large pumpkin cheesecake, but the mini versions are perfect for portion control and presentation.
Can I prepare these in advance for a party?
Yes, these mini cheesecakes are perfect for make-ahead entertaining. Prepare them the day before to save yourself stress on party day. They taste fresh and delicious even after a full day in the refrigerator.
Final Thoughts
This No-Bake Mini Pumpkin Cheesecakes Recipe has become one of my absolute favorite quick and easy fall desserts. The balance of creamy pumpkin filling with a crunchy crust in tiny, charming portions is simply unstoppable. I hope you give it a try and let it bring a little extra cozy happiness to your autumn gatherings or quiet snack times. Enjoy every bite of this warm, comforting, and effortlessly elegant treat!
Print
No-Bake Mini Pumpkin Cheesecakes Recipe
- Prep Time: 20 minutes
- Cook Time: 0 minutes
- Total Time: 3 hours 20 minutes
- Yield: 12 mini cheesecakes
- Category: Dessert
- Method: No-Cook
- Cuisine: American
- Diet: Vegetarian
Description
Delight in these No-Bake Mini Pumpkin Cheesecakes, a creamy and festive fall dessert that’s easy to prepare and perfect for any occasion. Featuring a buttery graham cracker crust with a smooth pumpkin-spiced cream cheese filling, these individual cheesecakes require no oven time and are chilled to perfection. They’re ideal for a quick yet impressive treat that all pumpkin lovers will enjoy.
Ingredients
Crust
- 1 cup graham cracker crumbs
- 3 tablespoons melted butter
- 2 tablespoons brown sugar
Filling
- 8 ounces cream cheese, softened
- 1/2 cup canned pumpkin puree
- 1/3 cup powdered sugar
- 1/2 teaspoon pumpkin pie spice
- 1/2 teaspoon vanilla extract
- 1 cup whipped topping or whipped cream, plus more for garnish
Instructions
- Prepare the crust: In a medium bowl, combine the graham cracker crumbs, melted butter, and brown sugar until the mixture is well blended. Divide the crust mixture evenly among 12 lined muffin cups, pressing firmly and evenly to form a compact crust base for each cheesecake.
- Make the filling: In a separate bowl, beat the softened cream cheese until smooth and creamy. Add the canned pumpkin puree, powdered sugar, pumpkin pie spice, and vanilla extract, mixing thoroughly until well combined and uniform in texture.
- Incorporate whipped topping: Gently fold the whipped topping into the pumpkin cream cheese mixture until it becomes light, smooth, and fluffy, ensuring you maintain the airy texture.
- Assemble the cheesecakes: Spoon the pumpkin filling over each prepared crust in the muffin cups, smoothing the tops with the back of a spoon or spatula for an even finish.
- Chill: Refrigerate the cheesecakes for at least 3 hours or until set and firm enough to hold their shape when removed from the muffin pan.
- Serve: Before serving, garnish each mini cheesecake with additional whipped cream and a light sprinkle of pumpkin pie spice, if desired, for an extra festive touch.
Notes
- You can substitute gingersnap crumbs for a spicier crust alternative.
- For a dairy-free version, use vegan cream cheese and dairy-free whipped topping.
- Mini cheesecakes can be frozen and thawed before serving without compromising texture or flavor.
