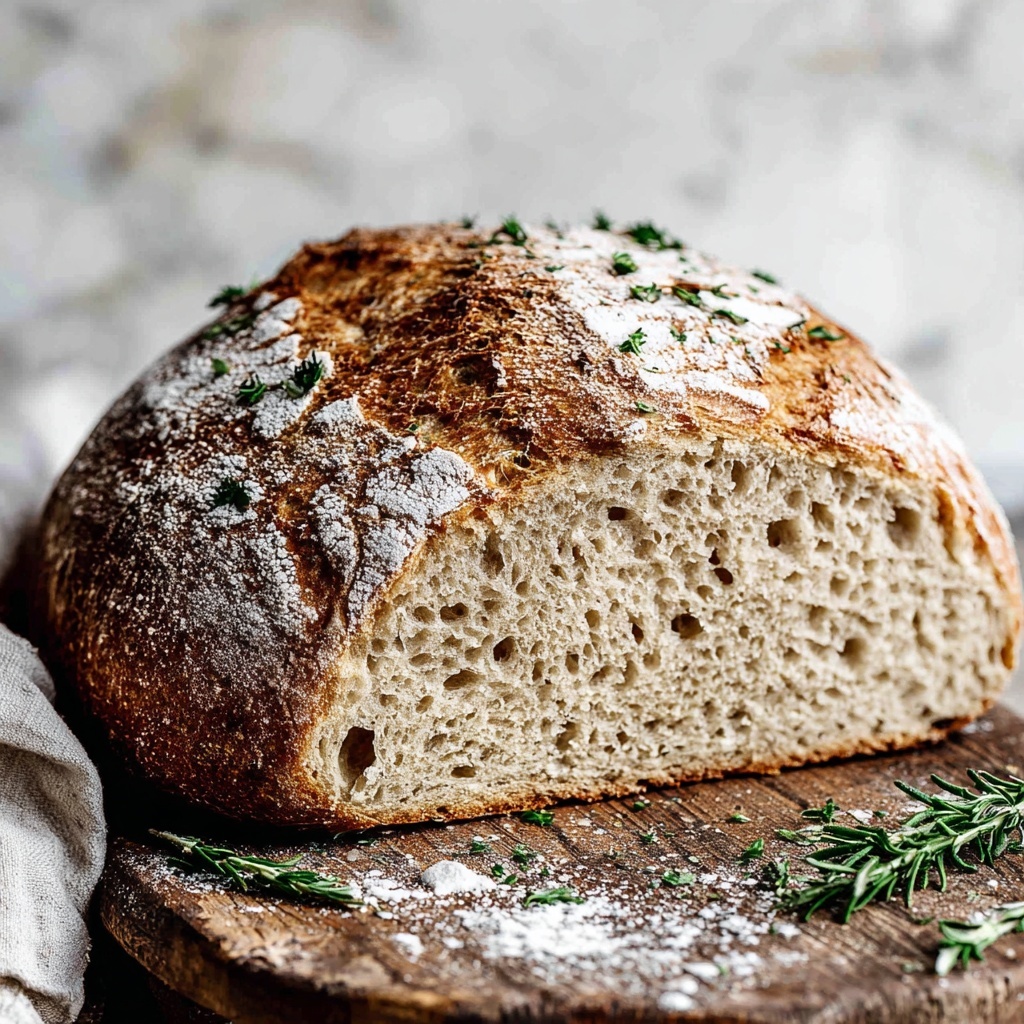
If you have ever dreamed of baking the warmest, most comforting loaf right in your own kitchen, then you are in for a real treat. Grandma’s Perfect Homemade Bread Recipe is just that—a timeless classic that combines simplicity with a delightful, crusty exterior and a soft, pillowy interior. The magic lies not only in the ingredients but in the loving steps that bring it all together, making your kitchen smell irresistibly inviting and your table more welcoming than ever before. This recipe captures everything that makes homemade bread an unforgettable experience.
Ingredients You’ll Need
Gathering these simple, yet essential ingredients is the first step toward baking that perfect loaf. Each component plays a crucial role, from the yeast that helps the bread rise to the olive oil that adds richness and tenderness.
- 2 1/4 teaspoons active dry yeast: This is the key agent that makes the bread dough rise beautifully, creating that fluffy texture we all love.
- 1 cup warm water (110°F/45°C): Perfect to activate the yeast without killing it, ensuring a steady rise.
- 1 tablespoon sugar: Adds just enough sweetness to feed the yeast and balance the flavors in the bread.
- 3 tablespoons olive oil (or vegetable oil): Contributes to the tender crumb and adds a subtle richness to every bite.
- 1 1/2 teaspoons salt: Essential for flavor, salt enhances all the other flavors while regulating yeast activity.
- 3 cups all-purpose flour (more for kneading): The foundation of the bread, giving it structure and that satisfying chewiness.
- 1 tablespoon honey (optional): Used for a touch of natural sweetness and a hint of golden color in the crust.
- 1 tablespoon butter (for greasing the pan): Ensures the bread bakes perfectly without sticking, while adding a gentle buttery note to the crust.
How to Make Grandma’s Perfect Homemade Bread Recipe
Step 1: Activate the Yeast
Start by stirring the active dry yeast into the warm water along with the sugar. Let it sit for about 5 to 10 minutes until it becomes frothy and bubbly. This step confirms the yeast is alive and kicking, ready to work its magic on the dough.
Step 2: Mix the Dough
In a large bowl, combine the flour and salt. Add in the olive oil and activated yeast mixture. If you’re using honey, incorporate it here for that extra depth of flavor. Mix everything thoroughly until it begins to form a sticky dough.
Step 3: Knead the Dough
Turn the dough onto a lightly floured surface and knead for about 8 to 10 minutes. Kneading develops the gluten network, which gives bread its characteristic elasticity and structure. Keep adding flour sparingly if the dough is too sticky, but don’t overdo it—you want a soft, pliable dough.
Step 4: First Rise
Place the dough into a greased bowl covered with a clean kitchen towel or plastic wrap. Let it rise in a warm spot until doubled in size, usually about 1 to 1 1/2 hours. This slow fermentation allows flavor to develop and the texture to become airy.
Step 5: Shape and Second Rise
Punch down the risen dough gently to release excess air. Shape it into a loaf and place it in the buttered pan. Cover again and let it rise for another 30 to 45 minutes until it has puffed up nicely.
Step 6: Bake to Perfection
Preheat your oven to 375°F (190°C). Bake the bread for about 30 to 35 minutes or until the crust turns golden brown and sounds hollow when tapped. This final touch locks in moisture, leaving you with a crusty outside and tender inside that would make any grandma proud.
How to Serve Grandma’s Perfect Homemade Bread Recipe

Garnishes
Because this bread is so versatile, simple garnishing can elevate each slice. Rub the warm bread lightly with garlic or brush with melted herb butter for an instant flavor boost. Sprinkling a bit of coarse sea salt or sesame seeds before baking gives the crust a sophisticated twist.
Side Dishes
This bread is a perfect companion to countless meals. Pair it with hearty soups like tomato basil or creamy potato leek, or serve alongside fresh salads for a lighter meal. It’s equally delightful with rich cheese boards, making it a must-have for any gathering.
Creative Ways to Present
Turn your loaf into a stunning centerpiece by slicing and arranging it in a woven basket lined with a colorful cloth. You can also make mini sandwiches using different fillings, transforming this humble bread into finger-friendly delights that will impress your guests.
Make Ahead and Storage
Storing Leftovers
Wrap the bread tightly in plastic wrap or store it in an airtight container at room temperature to keep it fresh for up to 3 days. This helps maintain the bread’s softness without drying out.
Freezing
If you want to enjoy Grandma’s Perfect Homemade Bread Recipe later, slice the loaf, wrap the slices individually in plastic wrap, then place them in a freezer-safe bag. Frozen bread will stay delicious for up to 3 months and can be toasted right from the freezer.
Reheating
To bring back that fresh-baked warmth, pop the bread or slices into an oven preheated to 350°F (175°C) for about 10 minutes. For slices, a quick toast works beautifully, restoring the crunchy crust and soft crumb instantly.
FAQs
Can I use whole wheat flour instead of all-purpose flour?
Absolutely! You can substitute whole wheat flour for a heartier, nuttier flavor, though the texture will be denser. Try a mix of half all-purpose and half whole wheat to strike a good balance.
What if I don’t have honey on hand? Can I skip it?
Yes, honey is optional and mainly adds a touch of sweetness and color. You can omit it without affecting the bread’s fundamental texture and rise.
How do I know if my yeast is still good?
If your yeast doesn’t foam and bubble after being added to warm water with sugar, it’s likely expired or dead. Fresh yeast will become frothy within 5 to 10 minutes, signaling it’s active and ready.
Can I make this bread in a bread machine?
Yes! Use the dough setting on your bread machine for the kneading and rising steps, then transfer the dough to a loaf pan for baking to ensure a crispy crust that bread machines often don’t provide.
Why is my bread dense instead of fluffy?
Dense bread usually means the dough lacked enough rising time or the yeast wasn’t fully activated. Make sure to give it plenty of time to double in size during both rises and use warm water to activate the yeast properly.
Final Thoughts
Baking this classic loaf brings a special kind of joy, connecting us to timeless kitchen traditions. I can’t recommend enough that you try Grandma’s Perfect Homemade Bread Recipe—it’s straightforward, satisfying, and completely worth every minute spent. Once you taste that warm slice with butter melting on top, you’ll understand why it’s a cherished recipe for generations!
Print
Grandma’s Perfect Homemade Bread Recipe
- Prep Time: 20 minutes
- Cook Time: 35 minutes
- Total Time: 1 hour 55 minutes
- Yield: 1 loaf (about 12 slices)
- Category: Bread
- Method: Baking
- Cuisine: American
Description
Grandma’s Perfect Homemade Bread is a classic, easy-to-follow recipe that yields a soft, flavorful loaf with a slightly crispy crust. This bread is perfect for sandwiches, toast, or as a side for any meal, made from simple ingredients and traditional baking methods.
Ingredients
Yeast Mixture
- 2 1/4 teaspoons active dry yeast (1 packet)
- 1 cup warm water (110°F/45°C)
- 1 tablespoon sugar
Dough
- 3 cups all-purpose flour (plus more for kneading)
- 3 tablespoons olive oil (or vegetable oil)
- 1 1/2 teaspoons salt
- 1 tablespoon honey (optional, for extra flavor)
For Baking
- 1 tablespoon butter (for greasing the pan)
Instructions
- Activate the Yeast: In a small bowl, combine the warm water with the active dry yeast and sugar. Stir gently and let it sit for about 5-10 minutes until the mixture becomes frothy, indicating the yeast is activated.
- Prepare the Dough: In a large mixing bowl, combine the flour, salt, and honey (if using). Add the activated yeast mixture along with the olive oil. Stir until the ingredients come together into a rough dough.
- Knead the Dough: Transfer the dough onto a lightly floured surface and knead for about 8-10 minutes until it becomes smooth and elastic. Add small amounts of flour as needed to prevent sticking, but avoid adding too much to keep the bread soft.
- First Rise: Lightly grease a large bowl with some olive oil or butter, place the dough inside, and cover it with a clean kitchen towel or plastic wrap. Let it rise in a warm, draft-free area for about 1 to 1.5 hours until it doubles in size.
- Shape the Loaf and Second Rise: Punch down the risen dough to release air bubbles and shape it into a loaf. Lightly butter a loaf pan and place the shaped dough inside. Cover again and let rise for another 30-45 minutes until it puffs up.
- Preheat the Oven: While the dough is on its second rise, preheat your oven to 375°F (190°C).
- Bake the Bread: Place the loaf pan in the preheated oven and bake for 30-35 minutes until the bread is golden brown on top and sounds hollow when tapped.
- Cool the Bread: Remove the bread from the oven and let it cool in the pan for 10 minutes before transferring to a wire rack to cool completely. This ensures a better crust texture.
Notes
- Warm water should not exceed 110°F (45°C) to avoid killing the yeast.
- Adding honey is optional but gives a slightly sweeter, richer flavor.
- Ensure the dough is kneaded properly to develop gluten for a good texture.
- Letting the dough rise in a warm place accelerates yeast activity.
- You can substitute olive oil with vegetable oil or melted butter.
- For a softer crust, brush the top of the loaf with melted butter right after baking.


