
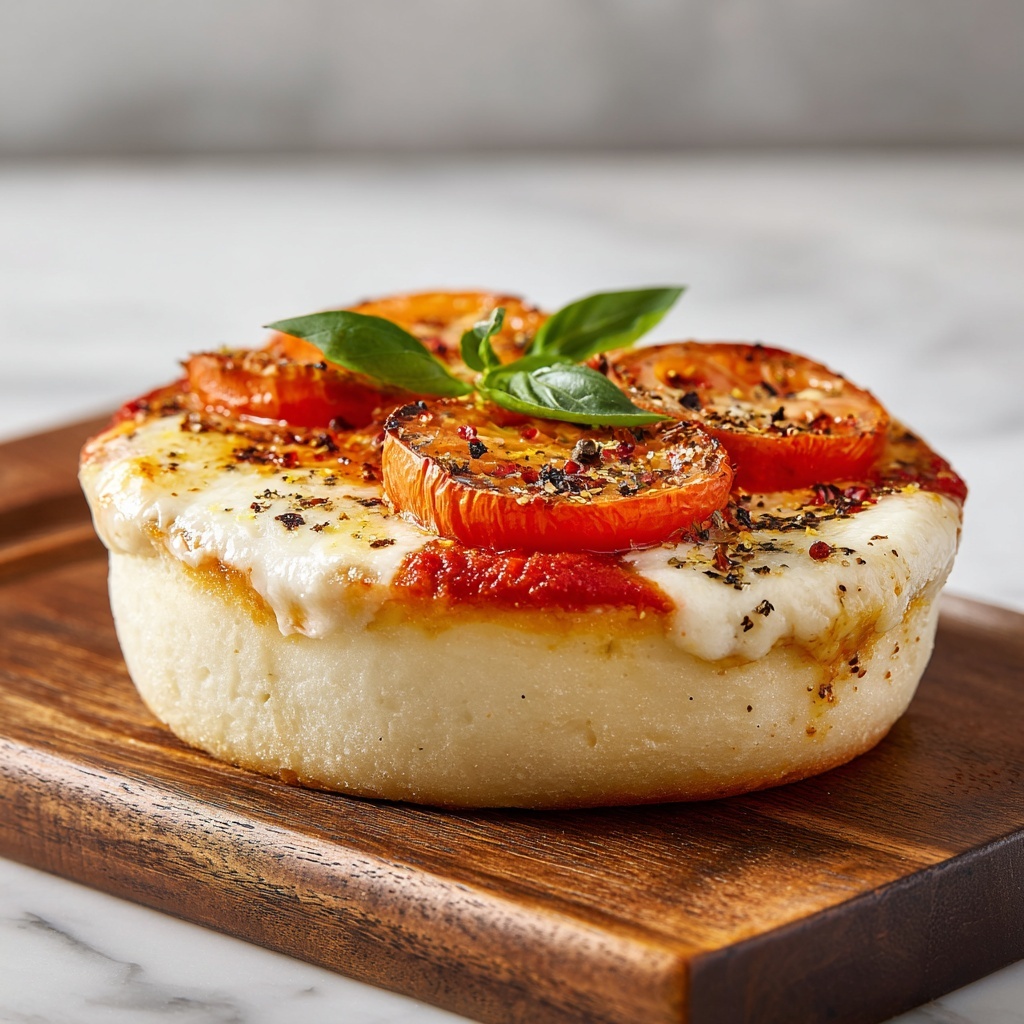
If you’re on the lookout for a fun, quick, and crowd-pleasing meal idea, look no further than this Easy Mini Lunchbox Pizzas Recipe. These bite-sized wonders transform simple pita breads or English muffins into delightful personal pizzas that are bursting with melty cheese, rich tomato sauce, and your favorite toppings. Perfect for busy weeknights or packing into kids’ lunchboxes, these mini pizzas are a total game-changer—simple to make, easy to customize, and absolutely delicious every single time.

Ingredients You’ll Need
The beauty of the Easy Mini Lunchbox Pizzas Recipe lies in its straightforward, pantry-friendly ingredients that each play an important role. From the base to the toppings, every component adds flavor, texture, or a pop of color that makes these pizzas irresistible.
- 4 small whole wheat or regular pita breads (or English muffins): Provides the perfect sturdy base that crisps up beautifully in the oven.
- 1/2 cup pizza sauce or marinara sauce: The flavorful foundation adds tang and richness that every pizza needs.
- 1 cup shredded mozzarella cheese: Melts into gooey, golden perfection and binds all the toppings together.
- 1/4 cup pepperoni slices (optional): Classic and savory, adding a familiar, meaty bite if you like.
- 1/4 cup diced bell peppers (optional): Brings a fresh crunch and bright color to every mini pizza.
- 1/4 cup black olives, sliced (optional): Introduces an earthy, salty dimension that complements the cheese beautifully.
- 1/4 cup fresh basil leaves (optional): Adds a herbaceous freshness that elevates the flavor to the next level.
- 1/4 teaspoon dried oregano or Italian seasoning: A simple sprinkle that brings authenticity and Italian flair.
- Salt and pepper, to taste: Essential seasonings that enhance all the other ingredients.
- Olive oil for brushing (optional): A light brush helps achieve a crispier, golden crust that’s extra tasty.
How to Make Easy Mini Lunchbox Pizzas Recipe
Step 1: Preheat Your Oven
Start by heating your oven to 375°F (190°C). If you prefer to use an air fryer, set it to 350°F (175°C). Preheating is key because it ensures your pizzas bake evenly, and the crust will turn perfectly crisp just as the cheese melts.
Step 2: Prepare the Pizza Base
Lay out your pita breads or English muffins on a baking sheet. For those who love a crunchier base, lightly brush the tops with olive oil. This extra step adds a subtle richness and helps the edges brown into a crispy, golden delight.
Step 3: Spread the Sauce
Smear about 1 tablespoon of your favorite pizza or marinara sauce onto each pita or muffin piece. Make sure to leave a little border around the edges so the sauce doesn’t spill over as it cooks. The sauce layer is where all the delicious Italian flavors begin to build.
Step 4: Add Cheese and Toppings
Generously sprinkle shredded mozzarella over the sauce. Then get creative—layer on pepperoni, diced bell peppers, black olives, and fresh basil, or stick to your favorites. Don’t forget a pinch of dried oregano or Italian seasoning to add that authentic touch. Seasonal veggies or different cheeses can work wonders here too!
Step 5: Bake to Perfection
Pop your mini pizzas into the preheated oven and bake for 8 to 10 minutes. You’ll know they’re ready when the cheese is melted and bubbly, and the crust edges turn golden brown and crisp. This quick baking time keeps everything deliciously fresh and perfectly cooked.
Step 6: Cool and Serve
Once out of the oven, let your mini pizzas cool for a couple of minutes before serving. This step helps the melted cheese settle so each bite isn’t too hot and perfectly holds its shape, ideal for packing into lunchboxes or serving as a snack anytime.
How to Serve Easy Mini Lunchbox Pizzas Recipe
Garnishes
Sprinkle chopped fresh basil or a few red pepper flakes on top right before serving to add a burst of flavor and a beautiful color contrast. A drizzle of olive oil can enhance the overall richness too. Garnishes make these mini pizzas look as good as they taste, adding an inviting finishing touch.
Side Dishes
Pair your mini pizzas with crunchy veggie sticks, a crisp green salad, or a flavorful fruit medley. These sides not only add nutritional balance but also bring refreshing textures that complement the warm, cheesy pizzas perfectly—ideal for a well-rounded meal.
Creative Ways to Present
For a fun twist, serve these mini pizzas on a kid-friendly platter or stack them creatively for a pretty pizza tower. Wrapping them individually in parchment paper and securing with a cute sticker makes lunchbox packing exciting and mess-free. Presentation can turn a simple snack into a small celebration.
Make Ahead and Storage
Storing Leftovers
Place any leftover mini pizzas in an airtight container and store them in the refrigerator. They’ll stay fresh for up to 2 days. Storing them properly keeps the crust from getting soggy and preserves the vibrant flavors for your next meal or snack.
Freezing
If you want to save these for longer, freeze the mini pizzas on a baking sheet first until solid, then transfer them to a zip-top freezer bag or container. Frozen mini pizzas can last up to 1 month without losing their flavor, making meal prep a breeze when you need a quick bite later.
Reheating
For best results, reheat mini pizzas in a hot oven or toaster oven at 350°F (175°C) until the cheese is melty and crust crispy, usually about 5–7 minutes. Avoid microwaving if you want to keep the crust from turning chewy or soggy.
FAQs
Can I use different breads for these mini pizzas?
Absolutely! While pita breads and English muffins work wonderfully, you can experiment with naan or flatbreads for a unique texture and flavor. Just adjust baking times slightly if needed to avoid overcooking.
Is this recipe suitable for kids?
Definitely! These mini pizzas are kid-friendly and easy to customize with child-preferred toppings. They’re also great for little hands to hold and enjoy, making lunchtime a ton of fun.
Can I make these vegetarian or vegan?
Yes, for a vegetarian version, just skip the pepperoni and load up on veggies and herbs. For a vegan version, use dairy-free cheese and make sure your sauce is free from animal products. These tweaks keep the Easy Mini Lunchbox Pizzas Recipe accessible to many dietary needs.
How can I make these pizzas more nutritious?
Try using whole wheat pita or English muffins for added fiber, add plenty of colorful veggies as toppings, and include fresh herbs to boost antioxidants. This way, your mini pizzas are both tasty and nourishing.
Can I prepare these pizzas ahead of time?
Yes, you can assemble the mini pizzas ahead and refrigerate or freeze them before baking. Just add the cheese and toppings right before baking if you want to keep veggies crisp and fresh.
Final Thoughts
I genuinely believe once you try this Easy Mini Lunchbox Pizzas Recipe, it will become a staple in your kitchen. It’s simple, delicious, and perfect for so many occasions, whether it’s a quick family dinner, a lunchbox surprise, or a snack on the go. So go ahead, gather your favorite toppings, and get ready to enjoy some seriously satisfying mini pizzas that everyone will love!
Print
Easy Mini Lunchbox Pizzas Recipe
- Prep Time: 5 minutes
- Cook Time: 10 minutes
- Total Time: 15 minutes
- Yield: 4 mini pizzas
- Category: Lunch
- Method: Baking
- Cuisine: Italian-American
- Diet: Vegetarian
Description
These Easy Mini Lunchbox Pizzas are quick, customizable, and perfect for busy days or packed lunches. Made with simple ingredients like pita bread or English muffins, pizza sauce, mozzarella cheese, and your choice of toppings, they bake to a golden, crispy perfection in just about 10 minutes. A fun and delicious way to enjoy pizza in a convenient, personal size.
Ingredients
Base
- 4 small whole wheat or regular pita bread (or English muffins)
Sauce and Cheese
- 1/2 cup pizza sauce or marinara sauce
- 1 cup shredded mozzarella cheese
Toppings (Optional)
- 1/4 cup pepperoni slices
- 1/4 cup diced bell peppers
- 1/4 cup black olives, sliced
- 1/4 cup fresh basil leaves
Seasoning
- 1/4 teaspoon dried oregano or Italian seasoning
- Salt and pepper, to taste
Other
- Olive oil for brushing (optional)
Instructions
- Preheat the oven: Preheat your oven to 375°F (190°C). If you prefer using an air fryer, preheat it to 350°F (175°C) instead.
- Prepare the base: Lay the pita bread or English muffins on a baking sheet. For a crisper crust, lightly brush the tops with a small amount of olive oil before adding any toppings.
- Add the sauce: Evenly spread about 1 tablespoon of pizza sauce on each pita or muffin base, leaving a small border around the edges to prevent sogginess.
- Top with cheese and toppings: Generously sprinkle shredded mozzarella cheese over the sauce on each base. Add your choice of toppings such as pepperoni slices, diced bell peppers, sliced black olives, or fresh basil leaves. Finish by sprinkling a pinch of dried oregano or Italian seasoning for added flavor. Season with salt and pepper to taste.
- Bake the pizzas: Place the mini pizzas in the preheated oven and bake for 8-10 minutes. Bake until the cheese is fully melted, bubbly, and the edges of the pita or muffin turn golden and crispy.
- Serve: Remove the pizzas from the oven and allow them to cool slightly. These mini pizzas are now ready to be packed into lunchboxes or enjoyed as a tasty snack.
Notes
- For a crispier base, brushing the pita or muffin with olive oil before baking helps.
- Feel free to customize toppings based on your preference or dietary needs.
- Leftover mini pizzas can be stored in an airtight container and reheated in a toaster oven to maintain crispiness.
- Whole wheat pita or English muffins add extra fiber and a nuttier flavor.
- If using an air fryer, monitor cooking times as they may vary slightly compared to an oven.


