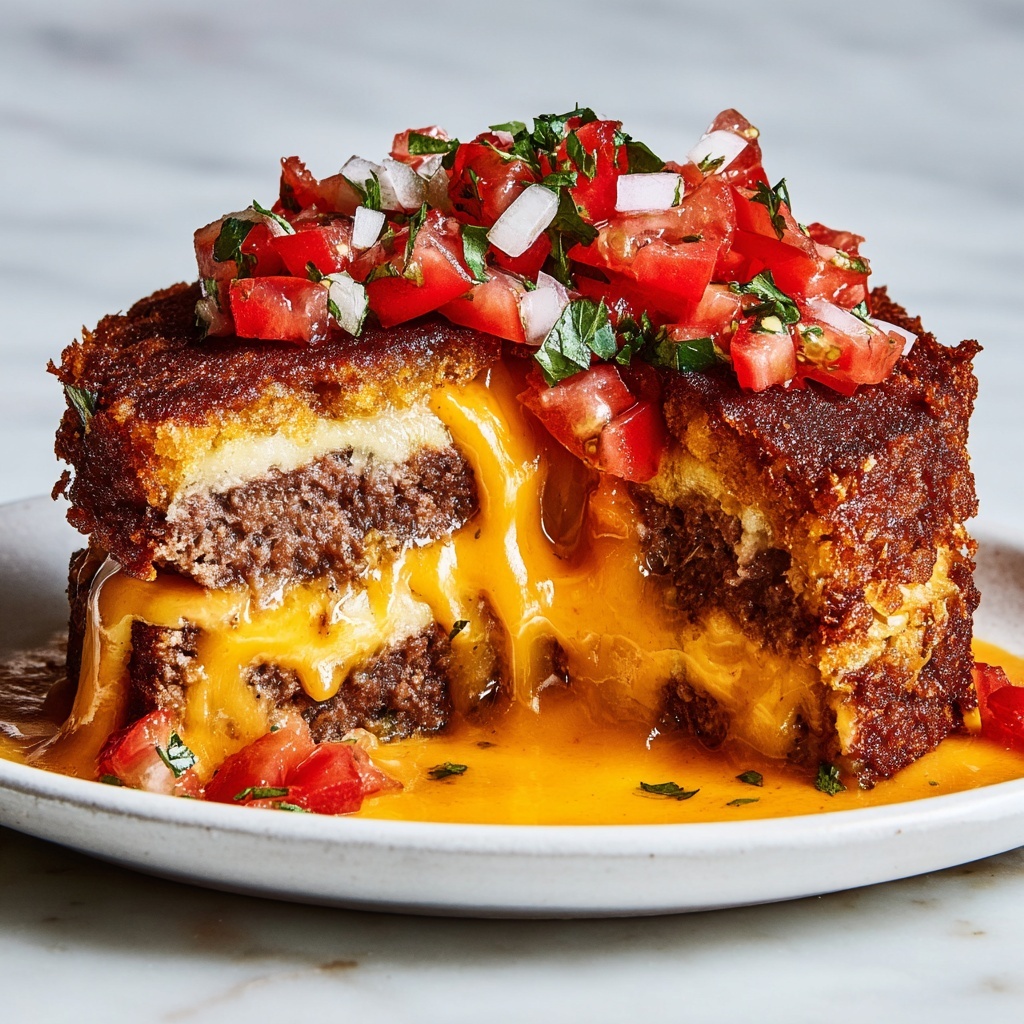
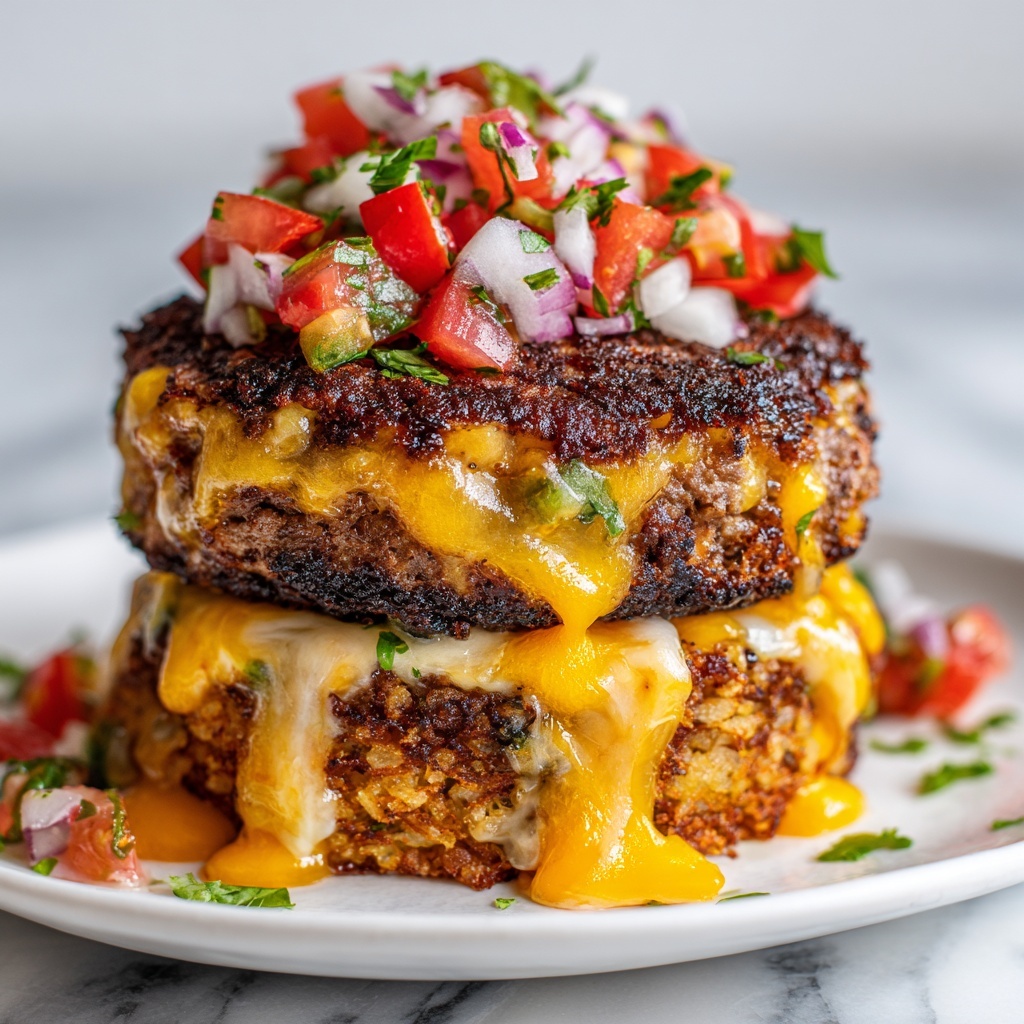
If you are a fan of comfort food mashed with playful creativity, the Cheeseburger Stuffed Tater Tot Cones with Colossal Cheese Volcano Recipe is a must-try. This decadent dish features crispy tater tot shells hugging juicy, seasoned ground beef, topped with a dramatic, gooey mountain of melted cheddar. It’s an irresistible combination that transforms familiar flavors into an exciting handheld treat that’s perfect for family dinners, game day, or impressing friends with something fun and filling.
Ingredients You’ll Need
Ingredients You’ll Need
The beauty of this recipe lies in its simplicity; each ingredient brings something unique that builds texture, flavor, or that crowd-pleasing look. You don’t need a long list of components to create a wow-worthy dish, just a few staples done exceptionally well.
- 1 lb ground beef: This is the savory heart of the cone, providing rich, meaty flavor and satisfying protein.
- 1 small onion, finely chopped: Adds subtle sweetness and depth, enhancing the beef’s taste.
- 1 teaspoon garlic powder: Infuses a gentle punch of aromatic flavor without overpowering.
- 1 teaspoon smoked paprika: Brings warmth and a hint of smoky complexity that makes the burger mixture stand out.
- Salt and pepper to taste: Essential for balancing and brightening every bite.
- 2 cups frozen tater tots: The crispy, golden exterior that forms the fun and textural shell of each cone.
- 2 cups shredded cheddar cheese: This creates the dramatic, melted cheese volcano that oozes irresistible gooey goodness.
- 1/2 cup pickles, chopped (optional): Offers a tangy crunch that contrasts beautifully with the richness.
- Ketchup and mustard for serving: Classic condiments that complement all the flavors perfectly.
- Cooking spray or oil for greasing: Prevents sticking and helps achieve that perfect golden crust on the tater tots.
How to Make Cheeseburger Stuffed Tater Tot Cones with Colossal Cheese Volcano Recipe
Step 1: Prepare Your Oven and Cone Molds
Preheat your oven to 425°F (220°C). Grease a cone-shaped mold generously with cooking spray or oil so the tater tots don’t stick. If you don’t have cones, make your own using sturdy aluminum foil shaped into cones—this DIY approach works just as well and lets your creativity shine.
Step 2: Form the Tater Tot Shells
Take the frozen tater tots and gently press them around the greased cones, stacking them to create a sturdy shell. The goal here is a crispy, golden cage that will hold all the delicious fillings inside.
Step 3: Bake the Tater Tot Cones
Place the cones upright on a baking sheet and bake for 25 to 30 minutes until the tater tots are golden brown and crunchy. Remember to turn them halfway through for even cooking. This crispy shell is the foundation of your masterpiece.
Step 4: Cook the Cheeseburger Filling
While the cones are baking, heat a skillet over medium heat and cook the ground beef with the finely chopped onion. Add garlic powder, smoked paprika, salt, and pepper for a burst of flavor. Cook until the beef is browned and no longer pink, then drain any excess fat. This savory filling is what makes these cones taste like a true cheeseburger experience.
Step 5: Stuff the Tater Tot Cones
Once your crispy tater tot cones are out of the oven, carefully remove them from the molds. Fill each cone with a generous portion of the cooked cheeseburger mixture, adding chopped pickles if you like that classic tangy crunch.
Step 6: Create the Colossal Cheese Volcano
Pile shredded cheddar cheese on top of each filled cone, creating a mountain of melty, molten cheese. The cheese volcano is the star visual and flavor component of this recipe.
Step 7: Melt the Cheese to Perfection
Return the stuffed cones to the oven for another 5 to 7 minutes. This step melts the cheddar into a bubbly, golden crown that oozes down the sides, inviting everyone to dig in.
Step 8: Serve Hot with Your Favorite Condiments
Serve your Cheeseburger Stuffed Tater Tot Cones with Colossal Cheese Volcano Recipe immediately, accompanied by ketchup and mustard for dipping. Enjoy the fantastic medley of textures and flavors while the cheese is deliciously molten.
How to Serve Cheeseburger Stuffed Tater Tot Cones with Colossal Cheese Volcano Recipe
Garnishes
Sprinkle chopped fresh parsley or green onions over the cones for a pop of color and a fresh bite that balances the richness. A few sesame seeds toasted on top of the cheese volcano add a subtle crunch and a nod to traditional burger buns.
Side Dishes
Pair these cones with crunchy coleslaw for a refreshing contrast or a simple green salad dressed with tangy vinaigrette. For heartier occasions, crispy sweet potato fries or a bowl of hearty tomato soup complement the indulgent cones beautifully.
Creative Ways to Present
For a party, serve each cone in individual cone holders or specially designed stands that keep them upright and easy to eat. You can also offer various cheese types on the side for guests to customize their own cheese volcano experience—for instance, pepper jack for spice or mozzarella for gooey stretch.
Make Ahead and Storage
Storing Leftovers
If you have any leftovers (and that might be rare!), wrap them tightly in foil or place them in an airtight container. Stored in the fridge, they will keep fresh for up to two days, ready for a quick snack or light meal.
Freezing
Because of the crispy tater tot shell and melty cheese topping, freezing is not ideal for preserving the original textures. However, you can freeze the cooked cheeseburger filling separately in an airtight container for up to three months, making future quick assemblies a breeze.
Reheating
To reheat, place leftover cones in a preheated oven at 350°F (175°C) for about 10 minutes. This method helps restore the tater tot crispiness and warms the cheese without drying out the meat. Avoid microwaving to prevent sogginess.
FAQs
Can I use other types of cheese for the cheese volcano?
Absolutely! While cheddar gives that classic bold flavor and gorgeous melty texture, feel free to experiment with mozzarella, pepper jack, or even a smoked gouda to add a different twist to your cones.
What if I don’t have cone molds?
No worries at all. You can easily create cone shapes using aluminum foil. Just fold the foil into cones, greasing them well before pressing in the tater tots. It’s a handy DIY workaround that works perfectly.
How spicy is this recipe?
This recipe is mild by default, with just a hint of smokiness from the paprika. If you prefer a kick, add some chili powder or diced jalapeños to the beef mixture for extra heat.
Can I make this recipe vegetarian?
Yes! Substitute the ground beef with a plant-based ground meat alternative or seasoned cooked lentils. The bold seasoning and crispy tater tot cones keep the dish satisfying and flavorful.
Is this recipe kid-friendly?
This dish is a total crowd-pleaser for kids who love cheeseburgers and tater tots. Just skip the pickles or any spicy additions to keep the flavors approachable for little palates.
Final Thoughts
There’s something truly magical about the Cheeseburger Stuffed Tater Tot Cones with Colossal Cheese Volcano Recipe. It’s a joyful mix of familiar flavors served in a playful, unforgettable way. Whether you’re cooking for family, friends, or just treating yourself, this recipe promises smiles, satisfied appetites, and plenty of ooey-gooey fun. You definitely want this one in your recipe rotation!
Print
Cheeseburger Stuffed Tater Tot Cones with Colossal Cheese Volcano Recipe
- Prep Time: 15 minutes
- Cook Time: 35 minutes
- Total Time: 50 minutes
- Yield: 6 servings
- Category: Appetizer
- Method: Baking
- Cuisine: American
Description
These Cheeseburger Stuffed Tater Tot Cones with a Colossal Cheese Volcano are a fun, handheld twist on classic cheeseburgers. Crispy tater tot shells are baked into cone shapes, filled with a savory ground beef and onion mixture seasoned with garlic and smoked paprika, then topped with gooey melted cheddar cheese. Perfect for a party appetizer or a creative family meal, these cones combine comforting flavors and impressive presentation in one delicious bite.
Ingredients
Cheeseburger Filling
- 1 lb ground beef
- 1 small onion, finely chopped
- 1 teaspoon garlic powder
- 1 teaspoon smoked paprika
- Salt and pepper to taste
Tater Tot Shell
- 2 cups frozen tater tots
- Cooking spray or oil for greasing
Cheese Volcano and Toppings
- 2 cups shredded cheddar cheese
- 1/2 cup pickles, chopped (optional)
- Ketchup for serving
- Mustard for serving
Instructions
- Prepare the Oven and Molds: Preheat your oven to 425°F (220°C). Grease cone-shaped molds with cooking spray or oil, or alternatively, fashion cones from aluminum foil for the tater tot shells.
- Form the Tater Tot Shells: Press frozen tater tots gently onto each cone mold, shaping them to form an even shell that will hold the filling without breaking.
- Bake the Tater Tot Cones: Place the tater tot cones on a baking sheet and bake for 25-30 minutes, turning them halfway through cooking to ensure they become golden brown and crispy all around.
- Cook the Cheeseburger Filling: While the shells bake, heat a skillet over medium heat and add the ground beef and finely chopped onion. Cook until the meat is browned and the onions are soft. Season with garlic powder, smoked paprika, salt, and pepper to taste. Drain any excess fat from the pan.
- Fill the Cones: Remove the baked tater tot shells from the oven and let them cool slightly for handling. Carefully fill each cone with the prepared cheeseburger mixture. Add chopped pickles inside the filling if using.
- Add the Cheese Volcano: Generously top each filled cone with shredded cheddar cheese, creating a mound that resembles a volcano.
- Melt the Cheese: Return the stuffed cones to the oven for an additional 5-7 minutes until the cheese melts thoroughly and is bubbly.
- Serve: Serve the cheeseburger stuffed tater tot cones hot, accompanied by ketchup and mustard for dipping.
Notes
- Use fresh or your favorite brand of frozen tater tots for best results; ensure they are evenly sized for consistent baking.
- For a spicier twist, add a pinch of cayenne pepper or chopped jalapeños to the beef mixture.
- Ensure the cone molds are sturdy; aluminum foil cones should be thick enough to hold their shape while baking.
- To keep the filling warm and the cones crispy, serve immediately after melting the cheese.
- Vegetarian version: Substitute ground beef with plant-based crumbles or seasoned lentils for a tasty alternative.


