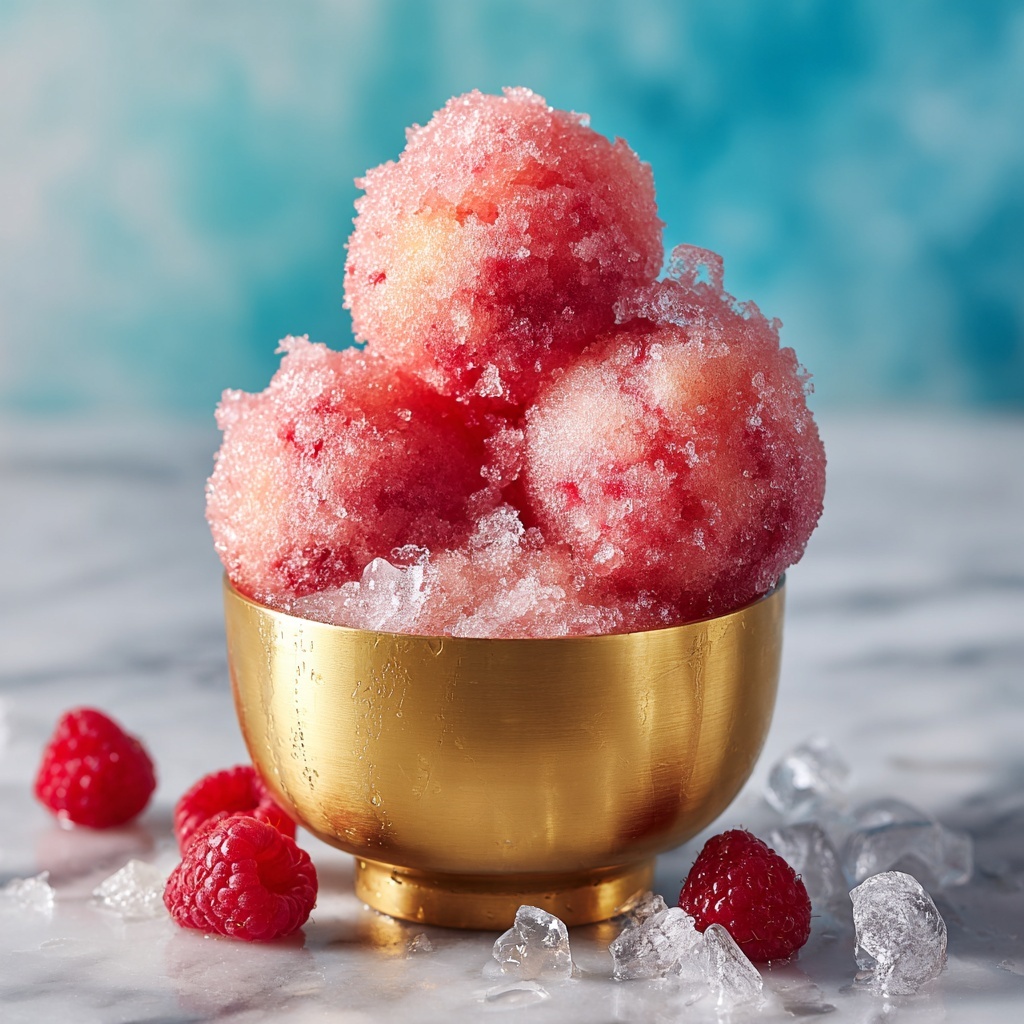
There is something genuinely magical about enjoying a cold, refreshing treat on a sweltering day, and nothing captures that feeling quite like Snow Cones: The Amazing Ultimate Recipe for Summer Delight Recipe. These delightful, colorful icy treats combine perfectly crushed ice with vibrant, flavorful syrups, creating a sensory experience that’s as fun to make as it is to eat. Whether you’re cooling off after a long afternoon or hosting a summer gathering, this recipe promises a burst of sweetness and nostalgia with every bite. Trust me, once you try this recipe, snow cones will become your go-to summer indulgence.

Ingredients You’ll Need
This recipe is wonderfully simple, yet every ingredient plays a vital role in crafting the perfect snow cone experience. From the crushed ice that forms the fluffy base to the syrup that brings color and flavor, each component has its purpose and charm.
- Crushed ice: Essential for that fluffy, snow-like texture, use a snow cone machine or a blender to get it just right.
- Granulated sugar: The foundation for creating a sweet, smooth syrup that balances the tartness of flavorings.
- Water: Acts as the base for dissolving sugar and blending in your chosen flavors for a perfectly smooth syrup.
- Flavored syrup (e.g., cherry, blueberry, lime): Adds vibrant color and delicious taste that defines your snow cone.
- Fresh fruit slices (optional): These can elevate your snow cones with bursts of natural freshness and an eye-catching garnish.
- Condensed milk (optional): A luscious drizzle that adds creamy richness and complements the icy sweetness beautifully.
How to Make Snow Cones: The Amazing Ultimate Recipe for Summer Delight Recipe
Step 1: Prepare the Ice
Start by crushing the ice until it’s light and fluffy, almost like fresh snow. This is crucial because the fine texture ensures the syrup soaks in perfectly without weighing down the ice, giving your snow cones that classic, melt-in-your-mouth sensation.
Step 2: Make the Syrup
Combine granulated sugar and water in a small saucepan over medium heat. Stir gently until every last grain of sugar dissolves, creating a clear and smooth syrup. This base syrup is what will carry all the flavor, so take your time to make it just right.
Step 3: Add Flavoring
Once your sugar syrup is ready, stir in the flavored syrup of your choice—whether it’s cherry, blueberry, or something zesty like lime. Allow this mixture to cool to room temperature, ensuring that the flavors meld together and the syrup thickens just a bit for perfect pouring consistency.
Step 4: Fill the Cups
Grab your favorite paper cones or cups and spoon in the crushed ice, pressing it gently to pack it tightly yet keeping it airy. The way you build your snow cone affects how the syrup will distribute, so take a moment here to get a good base going.
Step 5: Drizzle the Syrup
Generously pour your cooled, flavored syrup over the packed ice. Don’t be shy—this is where the magic happens. The syrup will seep into the ice, bringing vibrant color and refreshing sweetness to every bite.
Step 6: Optional Toppings
For an extra special touch, add a few fresh fruit slices atop your snow cone or drizzle with condensed milk. This layer adds complexity, balancing the icy texture with creamy smoothness and fresh bursts of flavor.
Step 7: Serve Immediately
Snow cones are best enjoyed right away while the ice is still perfectly fluffy and cold. This recipe ensures you get that ideal contrast of textures and flavors in every bite—don’t wait or it might start melting too quickly!
How to Serve Snow Cones: The Amazing Ultimate Recipe for Summer Delight Recipe

Garnishes
Garnishing your snow cones turns a simple treat into a visually stunning delight. Fresh fruit slices like strawberries, kiwi, or citrus wedges add pops of natural color and a hint of tang that pairs wonderfully with the sweetness. Even a sprig of mint can elevate the presentation and add a refreshing aroma that makes your treat feel extra special.
Side Dishes
Though snow cones are fabulous on their own, pairing them with light side dishes like tropical fruit salads or simple finger sandwiches can turn your summer gathering into a full celebration. These side dishes help balance out the icy sweetness and keep everyone happily munching between sips and bites of their chilly cones.
Creative Ways to Present
If you want to get creative with serving, try layering different flavored syrups to create a colorful ombré effect, or serve snow cones in clear cups so everyone can admire the vibrant hues inside. You could also offer a syrup tasting bar with multiple flavors, allowing friends and family to customize their perfect summer delight.
Make Ahead and Storage
Storing Leftovers
Since snow cones are best fresh, leftovers typically don’t hold their texture well. However, if you must store them, keep the syrup in an airtight container in the fridge for up to a week. The crushed ice, unfortunately, is best made fresh on each occasion.
Freezing
You can freeze your flavored syrup in ice cube trays for future use. This way, when the craving strikes, you have perfectly portioned syrup ready to make Snow Cones: The Amazing Ultimate Recipe for Summer Delight Recipe anytime without the prep time.
Reheating
If your syrup has become a bit thick after refrigeration, gently warm it up on the stove or microwave to reach the ideal pouring consistency. Be sure to cool it again before drizzling over your crushed ice to keep that refreshing chill in your snow cone.
FAQs
Can I use natural fruit juice instead of flavored syrup?
Absolutely! Natural fruit juice is a wonderful alternative that delivers authentic flavor without added sugars. Just be aware that the syrup might be slightly lighter in sweetness, so you can adjust by adding a little extra sugar if you like.
Do I need a snow cone machine to crush the ice?
While a snow cone machine is ideal for achieving the perfect texture, a high-powered blender or food processor can also do the job well. Just pulse the ice carefully to avoid turning it too watery.
How long will the snow cones stay good after making?
Snow cones are best eaten immediately for optimum texture and taste. As the ice melts, the texture changes, so try to enjoy them within 15-20 minutes of making.
Can I prepare the syrup in advance?
Yes! The syrup can be made days in advance and stored in the fridge in a sealed container. This makes it super convenient for spontaneous snow cone cravings or parties.
What are some fun syrup flavor combinations to try?
Mixing flavors like cherry and lime or blueberry and lemon can create exciting new tastes. You might also try tropical syrups like passionfruit or mango for an exotic twist that takes Snow Cones: The Amazing Ultimate Recipe for Summer Delight Recipe to the next level.
Final Thoughts
There’s no denying the joyful simplicity and pure refreshment that comes from indulging in snow cones, especially when crafted with care using Snow Cones: The Amazing Ultimate Recipe for Summer Delight Recipe. This recipe brings together just the right balance of sweetness, texture, and fun, making it an absolute must-try this summer. So gather your ingredients, invite some friends, and make your summer days a little cooler and a lot sweeter with these delightful icy treats!
Print
Snow Cones: The Amazing Ultimate Recipe for Summer Delight Recipe
- Prep Time: 10 minutes
- Cook Time: 15 minutes
- Total Time: 25 minutes
- Yield: 4 servings
- Category: Dessert
- Method: No-Cook
- Cuisine: American
Description
This Snow Cone recipe is the ultimate summer delight, featuring finely crushed ice topped with a homemade flavored syrup. Perfectly sweet and refreshingly cool, these snow cones can be customized with your favorite syrup flavors and optional toppings like fresh fruit slices or a drizzle of condensed milk for added creaminess.
Ingredients
Ice
- Crushed ice (enough for 4 snow cones)
Syrup
- 1 cup granulated sugar
- 1 cup water
- 1 cup flavored syrup (e.g., cherry, blueberry, lime)
Optional Toppings
- Fresh fruit slices for garnish
- Condensed milk for drizzling
Instructions
- Prepare the Ice: Use a snow cone machine or a blender to crush the ice into a fine, snow-like consistency that will mimic authentic snow cones.
- Make the Syrup: In a small saucepan, combine the granulated sugar and water. Heat over medium heat while stirring continuously until the sugar completely dissolves and the mixture becomes clear.
- Add Flavoring: Stir in your preferred flavored syrup or fruit juice into the sugar syrup. Allow the syrup to cool down to room temperature before using.
- Fill the Cups: Spoon the crushed ice into paper cones or cups, gently packing it down to form a perfect mound.
- Drizzle Syrup: Generously pour the prepared flavored syrup over the crushed ice until it is well coated and the flavors are evenly distributed.
- Optional Toppings: Enhance your snow cones by adding fresh fruit slices for garnish or drizzling condensed milk over the top to add extra flavor and creaminess.
- Serve Immediately: Enjoy your snow cones right away to experience the best texture and refreshing taste before the ice melts.
Notes
- Use a snow cone machine or a strong blender for the best crushed ice texture.
- You can use any fruit-flavored syrup or juice to customize your snow cones.
- Condensed milk adds a nostalgic creamy sweetness but is optional.
- Serve immediately to prevent melting and soggy texture.
- Try garnishing with fresh fruit to add freshness and visual appeal.


