
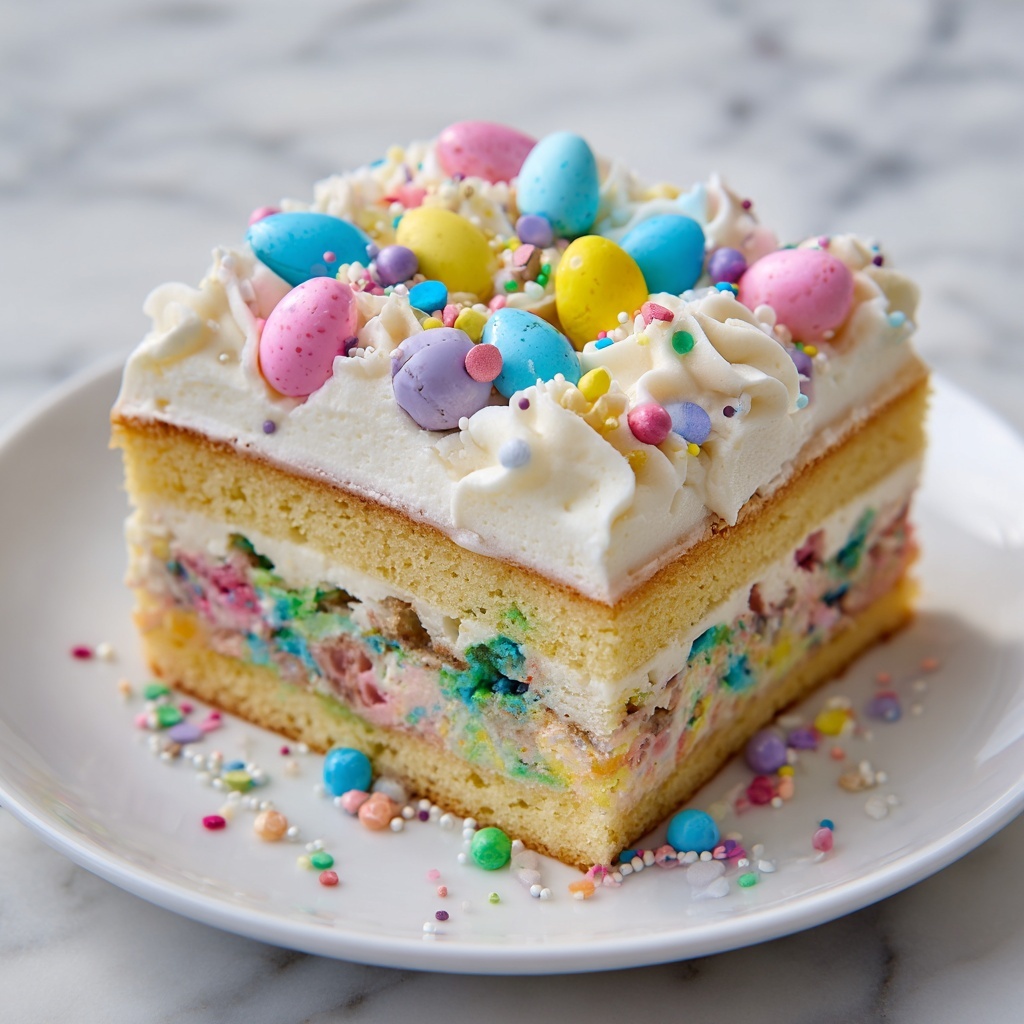
If you are looking for a playful, cheerful dessert to brighten up your spring gatherings, this Easter Poke Cake Recipe is an absolute winner. Combining a soft, colorful cake with creamy vanilla pudding and fluffy whipped topping, it delivers both a feast for the eyes and the taste buds. The vibrant, marbled batter and inviting sprinkles bring festive joy that kids and adults alike will adore. This recipe is easy to follow but guarantees something special enough to be the star of any Easter celebration or springtime party.
Ingredients You’ll Need
All the ingredients for this Easter Poke Cake Recipe are straightforward, accessible, and each one plays an important role in creating the perfect texture, flavor, and vibrant colors that make this dessert so delightful.
- 15.25 ounce package of white cake mix: A reliable base that bakes up light and tender, perfect for soaking up pudding.
- 3 large eggs or egg whites: Eggs add structure, and using just whites keeps the cake extra bright and pale.
- 1/2 cup vegetable oil: Provides moisture that keeps the cake soft and luscious.
- 3 cups milk, divided: Part goes into the batter; the rest is used for mixing the pudding to soak the cake.
- Gel food coloring in 3-4 colors (pink, purple, blue recommended): These concentrated colors create a dazzling marbled effect without altering the batter consistency.
- 3.4 ounces instant vanilla pudding mix: Adds a creamy layer of sweetness infused through the cake’s holes.
- 8 ounces Cool Whip or frozen whipped topping, thawed: A light and airy frosting that contrasts the rich pudding-soaked cake.
- Sprinkles or Easter candy for garnish: These final touches put the festive cherry on top with color and crunch.
How to Make Easter Poke Cake Recipe
Step 1: Prepare the Cake Batter
Start by preheating your oven according to the cake mix package instructions. In a large bowl, combine the white cake mix with eggs or egg whites, vegetable oil, and part of the milk until smooth. Dividing the batter into separate bowls lets you turn each into a different beautiful shade using your gel food colorings. This step lays the foundation for the stunning, playful look of the cake that will surely impress everyone.
Step 2: Bake the Colorful Batter
Lightly grease your 13×9-inch baking dish. Pour the colored batter in dollops to create a marbled effect—no need for precision, the swirling happens naturally! Bake the vibrant batter as directed on the package. Once baked, set the cake aside to cool just enough so it’s warm but not hot; this makes the pudding soak into the cake without melting the topping you’ll add later.
Step 3: Poke Holes and Add Pudding
Grab a wooden spoon handle or a similar dowel and gently poke evenly spaced holes all over the cake. These holes are crucial for absorbing the vanilla pudding mixture, which you prepare by whisking the instant pudding mix with the remaining milk until thickened. Slowly pour the pudding over the cake so it seeps right into the holes, infusing it with creamy sweetness and keeping every bite moist.
Step 4: Frost and Decorate
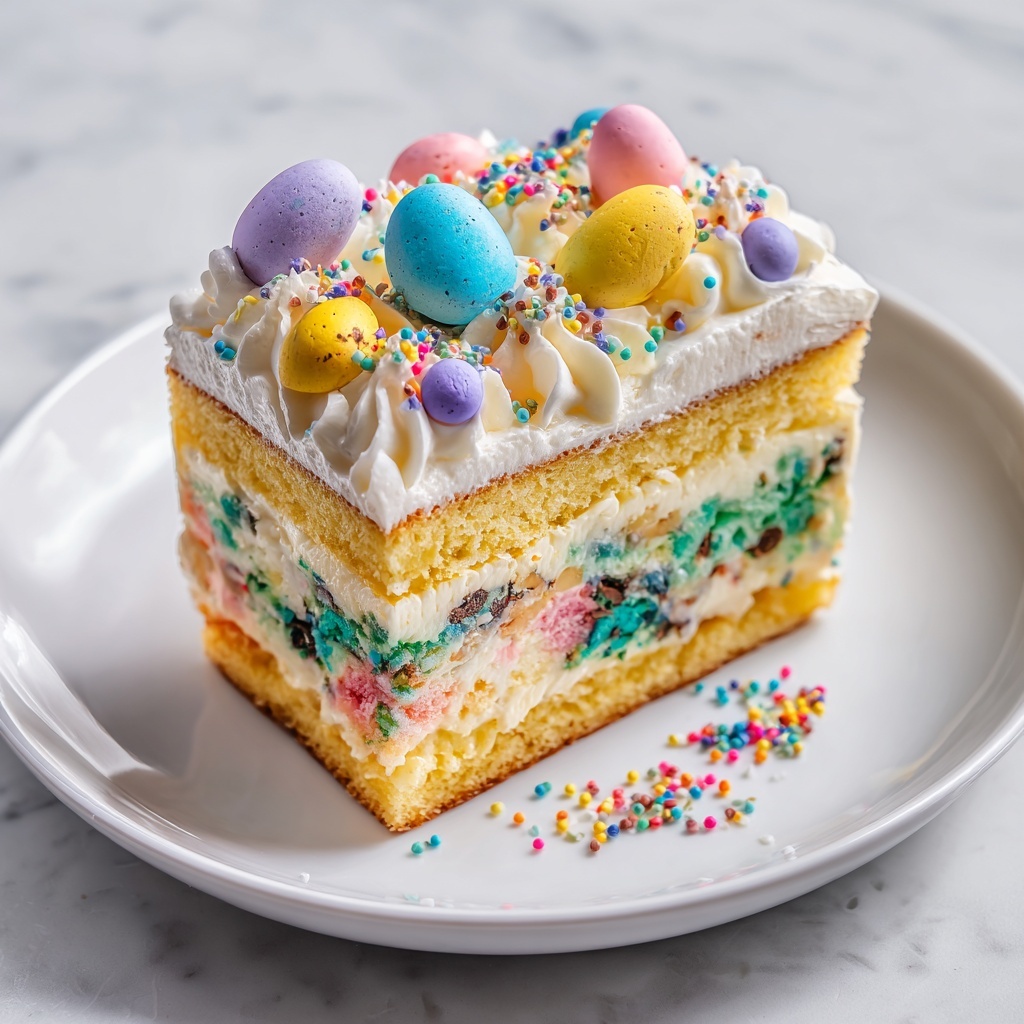
Once the pudding layer has settled, spread the thawed Cool Whip evenly over the cake using an offset spatula or the back of a spoon. This fluffy layer balances all the texture and sweetness beautifully. Finish off by scattering sprinkles or Easter-themed candies across the top—this is your chance to add whimsy and extra color that screams celebration.
How to Serve Easter Poke Cake Recipe
Garnishes
Adding garnishes to this cake is where your creativity gets to shine. Fresh edible flowers, pastel jelly beans, or pastel-colored mini marshmallows can be great alternatives or additions to sprinkles. They enhance the festive spirit and make each slice look even more inviting.
Side Dishes
Keep your serving simple to let the cake be the star. Fresh fruit like sliced strawberries or a bowl of mixed berries complements the cake’s sweetness with juicy brightness. A light cup of tea or a glass of cold milk pairs perfectly with this creamy dessert.
Creative Ways to Present
Try serving the Easter poke cake recipe in individual clear cups or trifle bowls for a fun twist, revealing all the colorful layers. You can also cut the cake into bite-sized squares and display them on a festive platter surrounded by Easter grass or colorful napkins to up the visual appeal for your party table.
Make Ahead and Storage
Storing Leftovers
This poke cake holds up well in the fridge thanks to the pudding and whipped topping layers. Store leftovers tightly covered with plastic wrap or in an airtight container to keep it moist and fresh for 3 to 4 days without losing any flavor or texture.
Freezing
While you can freeze this cake, keep in mind that whipped toppings may change texture after thawing. For best results, freeze the cake without the whipped topping and add fresh Cool Whip when ready to serve. Wrap tightly to avoid freezer burn and thaw overnight in the refrigerator.
Reheating
This cake is best enjoyed cold or at room temperature, so reheating is not recommended as it can cause the pudding and whipped topping to lose their ideal consistency. Simply let chilled cake sit out for 15–20 minutes before serving to soften slightly if preferred.
FAQs
Can I use homemade cake instead of cake mix?
Absolutely! A white homemade cake batter will work wonderfully if you want to avoid mixes. Just be sure your batter is thick enough to hold the marbled colors and that your cake isn’t too dense so it soaks the pudding nicely.
What if I don’t have gel food coloring?
You can use liquid food coloring, but gel colors are preferred because they provide more vibrant hues without thinning the batter. If using liquid, add sparingly to keep batter consistency intact.
Can I make this cake dairy-free?
Yes! Look for a dairy-free white cake mix and substitute plant-based milk and dairy-free pudding mix. Use a non-dairy whipped topping to complete the dessert while keeping it safe for dairy-free diets.
How far in advance can I make the cake?
You can bake the cake base a day ahead and keep it wrapped tightly. Prepare the pudding and topping on the day of serving to keep everything fresh and the toppings fluffy.
Why do we poke holes in the cake?
Poking holes allows the vanilla pudding mixture to seep deeply into the cake, adding moisture, flavor, and a creamy texture inside every bite, making it an irresistible treat compared to a dry layer cake.
Final Thoughts
This Easter Poke Cake Recipe is one of those joyful, crowd-pleasing desserts that brings smiles and compliments in equal measure. Its unique colorful design combined with luscious pudding and light whipped topping create a dessert experience worth sharing. Give this recipe a try at your next celebration and watch it become a new family favorite that everyone will look forward to year after year.
Print
Easter Poke Cake Recipe
- Prep Time: 20 minutes
- Cook Time: 35 minutes
- Total Time: 2 hours (including chilling time)
- Yield: 12 servings
- Category: Dessert
- Method: Baking
- Cuisine: American
Description
This Easter Poke Cake is a festive and colorful dessert perfect for holiday celebrations. A white cake is baked with vibrant gel food coloring swirled through the batter, then poked with holes to absorb a creamy vanilla pudding mixture. Topped with fluffy Cool Whip and decorated with sprinkles or Easter candies, this marbled and moist cake delights both kids and adults alike with its fun appearance and delicious flavors.
Ingredients
Dry Ingredients
- 15.25 ounce package of white cake mix
- 3.4 ounces instant vanilla pudding mix
Wet Ingredients
- 3 large eggs or egg whites (for a whiter cake)
- 1/2 cup vegetable oil
- 3 cups milk, divided
Decoration
- Gel food coloring in 3-4 colors (pink, purple, and blue recommended)
- 8 ounces Cool Whip or frozen whipped topping, thawed
- Sprinkles or Easter candy for garnish
Instructions
- Prepare the Cake: Preheat your oven as directed on the cake mix package. Combine the white cake mix with the eggs (or egg whites), vegetable oil, and part of the milk following the package instructions to create the batter.
- Color the Batter: Divide the batter evenly into separate bowls and tint each portion with a different gel food coloring to create vibrant colors, typically pink, purple, and blue.
- Assemble and Bake: Lightly grease a 13×9 inch baking dish. Pour the colored batters alternately into the dish to create a marbled or swirled effect. Bake according to the cake mix package instructions until a toothpick inserted in the center comes out clean. Allow the cake to cool slightly in the pan.
- Poke Holes: Using the handle of a wooden spoon or a dowel, poke holes evenly all over the surface of the cake, spacing them about 1 inch apart. This allows the pudding mixture to seep into the cake for added moisture and flavor.
- Prepare and Pour Pudding: Mix the instant vanilla pudding mix with the remaining milk until it thickens. Pour this pudding mixture evenly over the warm cake, ensuring it seeps into the holes created.
- Frost the Cake: Once the pudding has set slightly, spread the thawed Cool Whip or whipped topping evenly over the entire surface of the cake using an offset spatula or knife for smooth coverage.
- Decorate: Garnish the frosted cake with colorful sprinkles or Easter-themed candies to add a festive touch. Chill the cake before serving to let flavors meld and the frosting set.
Notes
- Using egg whites instead of whole eggs results in a whiter cake.
- Gel food coloring is preferred as it provides vivid colors without thinning the batter.
- Ensure the cake is slightly warm, not hot, when pouring pudding so it absorbs well but the pudding doesn’t melt the frosting.
- This cake can be made a day ahead; keep refrigerated to maintain freshness.
- For a dairy-free version, substitute Cool Whip with dairy-free whipped topping and use a non-dairy milk alternative in pudding and batter.

