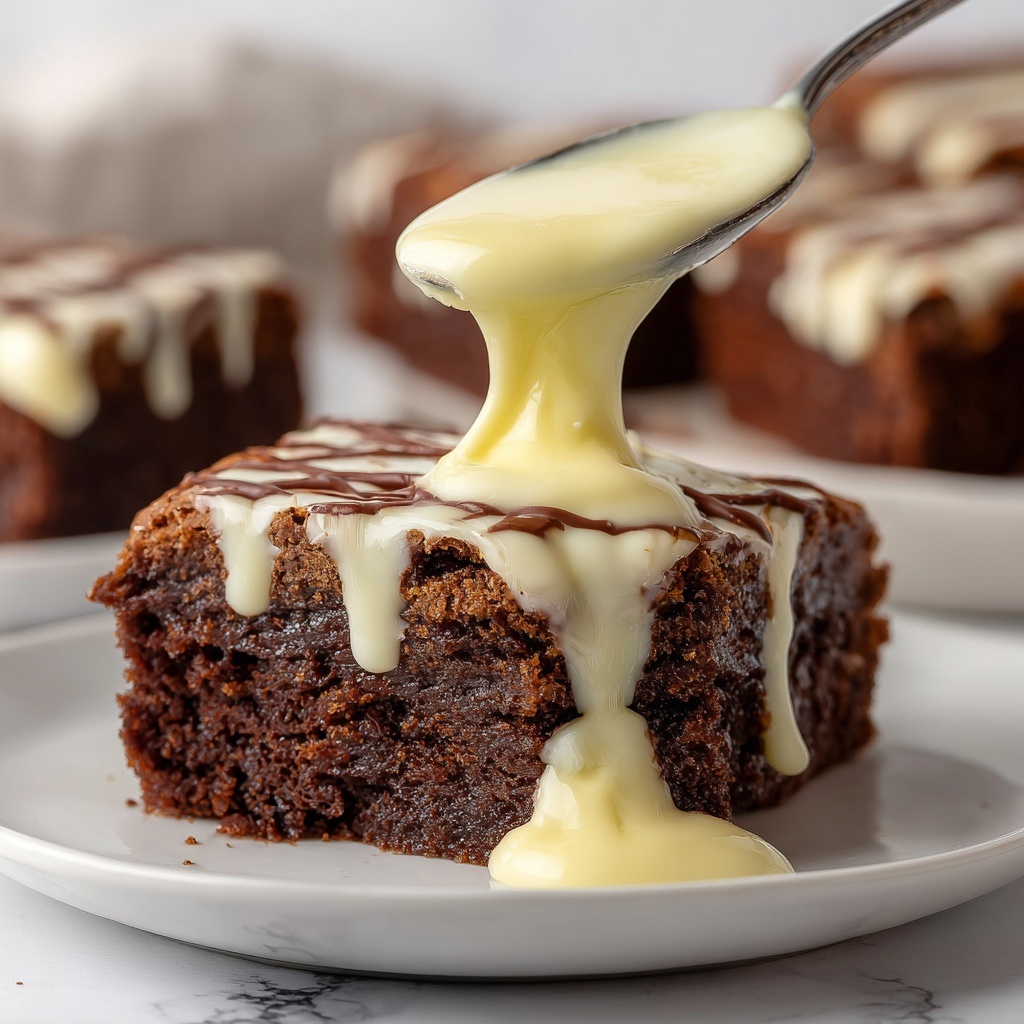
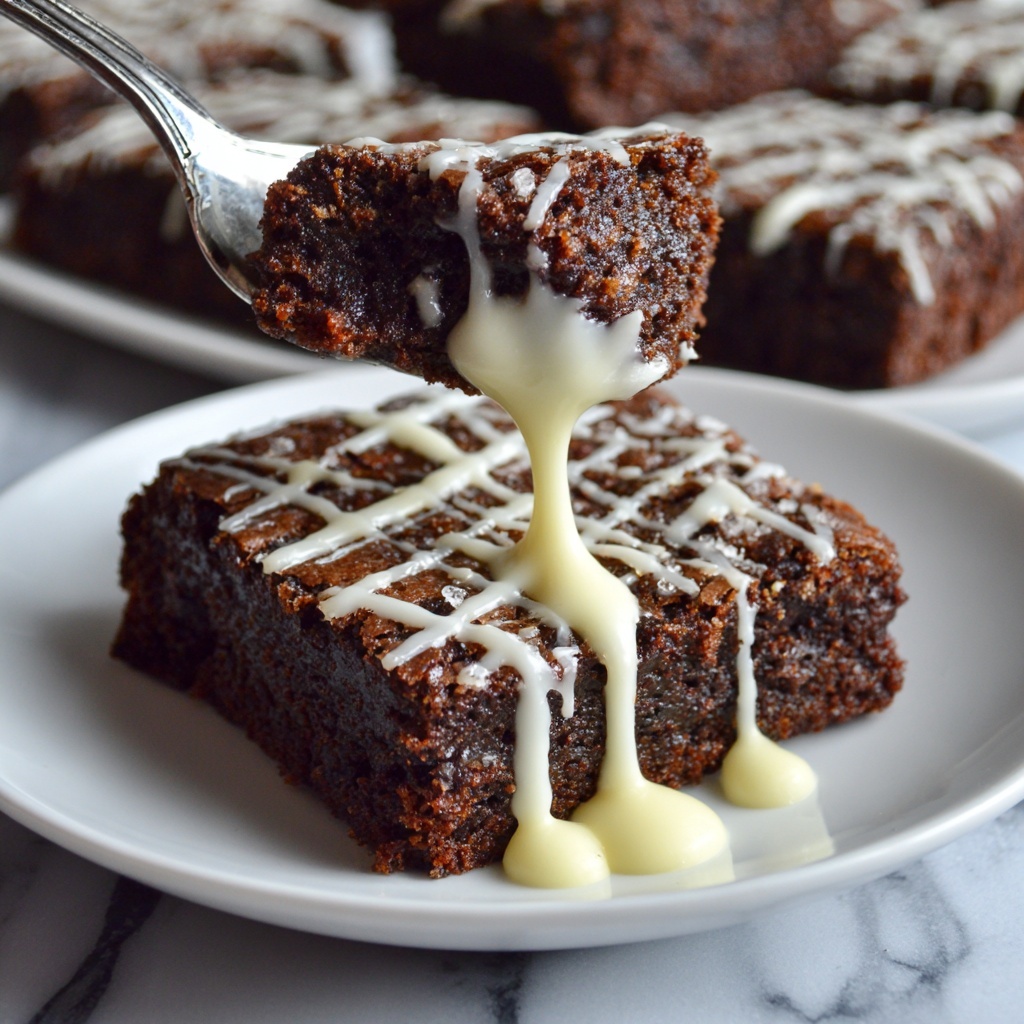
If you are ready to dive into a dessert that is both nostalgic and spectacularly indulgent, the Skillet Brownie Recipe is your perfect match. This treat combines a rich, fudgy core with a slightly crisp edge, all baked right in a cast iron skillet for that rustic charm everyone loves. Whether it’s a cozy night in or a special gathering with friends, this brownie offers a melt-in-your-mouth experience that’s hard to beat. Trust me, once you try this Skillet Brownie Recipe, it will become your go-to dessert whenever you crave that divine chocolate hit with a homemade touch.
Ingredients You’ll Need
Gathering simple, quality ingredients is the first step to creating the perfect skillet brownie. Each element plays a crucial role, from the creamy butter and rich cocoa to the sweetness of sugars and the depth of espresso powder. These common pantry staples come together to build the complex flavor and luscious texture that make this skillet brownie so irresistible.
- Butter (3/4 cup): Adds moisture and richness for a smooth, velvety brownie texture.
- Vegetable oil (1/4 cup): Keeps the brownie tender and enhances its moist crumb.
- Chocolate chips (1 1/2 cups, divided): Contribute gooey pockets of melted chocolate sweetness.
- Granulated sugar (1 cup): Provides the essential sweetness and gives structure.
- Brown sugar (3/4 cup): Infuses a subtle caramel note and adds chewiness.
- Eggs plus 2 yolks (3 eggs + 2 yolks): Offer structure and richness, balancing the moisture perfectly.
- Vanilla extract (2 teaspoons): Enhances the deep chocolate flavor with warm aromatic notes.
- All-purpose flour (1 1/4 cups): Builds the base of the brownie’s tender crumb.
- Dutch-process cocoa powder (1/2 cup): Adds an intense chocolate flavor with a smooth finish.
- Salt (1/2 teaspoon): Sharpens sweetness and balances flavors beautifully.
- Espresso powder (1/8 to 1/4 teaspoon, optional): Intensifies chocolate flavor without adding coffee taste.
How to Make Skillet Brownie Recipe
Step 1: Warm and Melt
Start by melting the butter, vegetable oil, and one cup of chocolate chips together. Doing this on medium heat in a saucepan creates a silky, glossy mixture that forms the foundation of your brownie’s fudgy texture. Once smooth, removing it from the heat and letting it cool slightly helps prevent cooking the eggs in the next step.
Step 2: Preheat and Prepare
While the chocolate is cooling, preheat your oven to 350°F (175°C) and grease a 10-inch cast iron skillet lightly. This preheating is vital as it ensures even baking and allows the skillet’s edges to crisp up just perfectly.
Step 3: Whisk the Eggs and Vanilla
In a separate bowl, whisk together the eggs, extra yolks, and vanilla extract until smooth and slightly frothy. This step provides aeration, helping the brownie achieve just the right balance between dense and tender.
Step 4: Combine Wet Ingredients
Slowly pour your egg and vanilla mixture into the warm chocolate blend, whisking constantly. This gradual incorporation ensures a smooth, cohesive batter without any lumps or cooked eggs.
Step 5: Add Dry Ingredients and Chocolate Chips
Next, fold in the flour, cocoa powder, salt, and espresso powder. Stir until just combined; a few streaks of flour are okay here. Finishing with the remaining chocolate chips folded in brings delightful pockets of melty chocolate throughout the brownie.
Step 6: Bake to Perfection
Pour the batter into your prepared skillet, smoothing out the top for an even bake. Bake for 30 to 35 minutes, depending on whether you prefer a gooey center or a more cooked texture. The edges should be set and slightly crisp while the middle remains moist and inviting.
Step 7: Cool and Enjoy
Allow the skillet brownie to cool for a few minutes before serving. This rest time lets the structure settle, making it easier to slice and enhancing the taste. Pairing it with a scoop of vanilla ice cream takes this dessert over the top.
How to Serve Skillet Brownie Recipe

Garnishes
Adding fresh, simple garnishes can take your skillet brownie from delicious to dazzling. Consider a sprinkle of flaky sea salt to enhance the chocolate depth, or dust with powdered sugar for a classic winter look. Fresh berries or a drizzle of caramel sauce can add a lovely burst of flavor and color.
Side Dishes
The decadent Skillet Brownie Recipe pairs wonderfully with vanilla ice cream, creating a warm-and-cold contrast that’s sheer bliss. A dollop of whipped cream or a side of fresh fruit salad can also brighten the decadent dessert, balancing richness with freshness.
Creative Ways to Present
Serving this brownie directly from the skillet offers a rustic, homey appeal that’s hard to resist. For a party twist, try topping individual brownie wedges with small scoops of ice cream and edible flowers. You can also drizzle chocolate or raspberry sauce artistically on the plate to impress your guests.
Make Ahead and Storage
Storing Leftovers
Leftover skillet brownie can be stored in an airtight container at room temperature for up to three days. Keeping it covered ensures it remains moist and soft rather than drying out.
Freezing
You can freeze the baked brownie either whole or sliced. Wrap tightly with plastic wrap and foil, then freeze for up to three months. Thaw overnight in the refrigerator before reheating for best texture.
Reheating
To reheat, pop individual slices in the microwave for 20 to 30 seconds or warm the entire skillet in a low oven (around 300°F) for 10 to 15 minutes. Reheating brings back that freshly baked warmth and gooey chocolate goodness.
FAQs
Can I use a different type of chocolate?
Absolutely! You can swap out semi-sweet chocolate chips for dark or milk chocolate ones based on your preference. Just keep in mind that darker chocolate will create a more intense flavor, while milk chocolate adds sweetness.
What if I don’t have a cast iron skillet?
If you don’t have a cast iron skillet, a heavy oven-safe pan or a round baking dish will work. Just make sure it’s greased well, and adjust the baking time slightly if your pan is thinner or thinner in diameter.
Is espresso powder necessary?
The espresso powder is optional but highly recommended because it enhances the chocolate flavor without making the brownie taste like coffee. If you prefer to skip it, your brownie will still be deliciously chocolaty.
How do I know when the brownies are done?
The edges should look set and slightly pulled away from the skillet. The center should still jiggle a bit but not be liquid. Insert a toothpick near the edge—it should come out with a few moist crumbs but not wet batter.
Can I make this recipe gluten-free?
Yes! Substitute the all-purpose flour with a gluten-free flour blend that measures cup-for-cup. Make sure your cocoa powder and other ingredients are certified gluten-free if you are sensitive.
Final Thoughts
You really can’t go wrong with this Skillet Brownie Recipe. Its blend of fudgy texture, rich flavor, and simple ingredients makes it a standout, simple dessert that feels special every time. So grab your skillet, get in the kitchen, and treat yourself and your loved ones to some chocolate magic that everyone will rave about!
Print
Skillet Brownie Recipe
- Prep Time: 10 minutes
- Cook Time: 35 minutes
- Total Time: 45 minutes
- Yield: 12 servings
- Category: Dessert
- Method: Baking
- Cuisine: American
Description
This Skillet Brownie recipe creates a rich, fudgy dessert baked right in a cast iron skillet. Combining melted butter, oil, and chocolate chips with eggs, sugar, and cocoa powder, it yields a deep chocolate flavor with a slightly crispy edge and soft center. Perfect for sharing, this easy-to-make brownie pairs wonderfully with vanilla ice cream for a decadent treat.
Ingredients
Wet Ingredients
- 3/4 cup butter
- 1/4 cup vegetable oil
- 3 eggs + 2 yolks
- 2 teaspoons vanilla extract
Dry Ingredients
- 1 cup granulated sugar
- 3/4 cup brown sugar
- 1 1/4 cups all-purpose flour
- 1/2 cup Dutch-process cocoa powder
- 1/2 teaspoon salt
- 1/8–1/4 teaspoon espresso powder (optional)
Chocolate
- 1 1/2 cups chocolate chips, divided (1 cup + 1/2 cup)
Instructions
- Melt the Chocolate Mixture: In a medium saucepan over medium heat, melt the butter, vegetable oil, and 1 cup of chocolate chips together. Stir continuously until completely smooth, then remove from heat and pour into a heat-proof mixing bowl. Allow to cool for 5 minutes.
- Preheat and Prepare Skillet: Preheat your oven to 350°F (175°C). Lightly grease a 10-inch cast iron skillet to prevent sticking.
- Whisk Eggs and Vanilla: In a separate bowl, whisk together the 3 eggs, 2 egg yolks, and 2 teaspoons vanilla extract until the mixture is smooth and well combined.
- Combine Wet Mixtures: Slowly pour the egg mixture into the slightly cooled chocolate mixture, whisking constantly to blend thoroughly.
- Add Dry Ingredients: Add the flour, Dutch-process cocoa powder, salt, and optional espresso powder to the mixture. Stir gently until almost combined, leaving a few streaks of flour visible.
- Incorporate Remaining Chocolate Chips: Add the remaining 1/2 cup chocolate chips to the batter and stir just until evenly mixed.
- Bake the Brownie: Transfer the batter into the prepared cast iron skillet, smoothing out the top evenly. Bake in the preheated oven for 30 to 35 minutes depending on how fudgy or firm you prefer the center.
- Cool and Serve: Let the brownie cool for a few minutes to set before serving. For best results, serve warm with a scoop of vanilla ice cream on top.
Notes
- For a more intense chocolate flavor, use Dutch-process cocoa powder as specified.
- Espresso powder is optional but enhances the chocolate depth without adding a coffee taste.
- Adjust baking time slightly to achieve your preferred brownie texture: less time for gooey, more time for cakier brownies.
- Using a well-seasoned cast iron skillet helps with even baking and easy release.
- Let the brownie cool briefly before serving to avoid overly molten center and to enhance flavor.
