If you’ve ever craved a dessert that feels like a warm hug on a spoon, then you’re in for a treat with this Banana Pudding From Scratch Recipe. It combines the sweet creaminess of homemade pudding with fresh bananas and crispy vanilla wafers, layering flavors and textures that melt perfectly in your mouth. This classic Southern American dessert is incredibly satisfying, fresh, and made entirely from scratch, giving you the joy of a truly homemade, no-bake layered dessert that’s as impressive as it is delicious.
Ingredients You’ll Need
Each ingredient in this recipe is simple yet essential, working together to create that luscious, silky pudding base, the subtle sweetness, and the satisfying crunch and freshness from bananas and wafers. Here’s what you’ll need to make magic happen:
- 3 ripe bananas (sliced): Choose bananas that are perfectly ripe for maximum sweetness and creamy texture.
- 3 cups whole milk: Whole milk gives the pudding its rich, velvety mouthfeel.
- ¾ cup granulated sugar: Sweetens the pudding just right without overpowering the natural banana flavor.
- ¼ cup cornstarch: This thickens the pudding beautifully for that perfect custard consistency.
- ¼ teaspoon salt: Enhances all the flavors and balances the sweetness.
- 4 large egg yolks: Provide richness and help with the pudding’s creamy texture.
- 2 tablespoons unsalted butter: Adds a touch of silkiness and depth of flavor.
- 2 teaspoons vanilla extract: Brings warmth and enhances the overall flavor profile.
- 1 box vanilla wafers: For layering and crunch, the classic companion to banana pudding.
- Whipped cream (for topping): Lightens the dessert with a fluffy finish.
How to Make Banana Pudding From Scratch Recipe
Step 1: Prepare the Pudding Base
Start by whisking together sugar, cornstarch, and salt in a medium saucepan to ensure even mixing and smooth pudding. In a separate bowl, gently whisk your egg yolks, then gradually blend in the whole milk. Slowly pour the milk mixture into the saucepan while continuously whisking to prevent lumps and keep everything silky.
Step 2: Cook the Custard
Place the saucepan over medium heat and stir constantly. This step requires a little patience because it takes about 8 to 10 minutes for the mixture to thicken and start bubbling gently. The stirring not only prevents scorching but also encourages a creamy, luscious texture that’s essential for the perfect pudding.
Step 3: Add Butter and Vanilla
Once thickened, remove the saucepan from the heat and immediately stir in the unsalted butter and vanilla extract. The butter creates a rich sheen and depth, while the vanilla adds its sweet floral aroma that gives the pudding its signature flavor.
Step 4: Cool Slightly
Let the pudding cool for a bit so it isn’t piping hot when assembling the pudding layers—this helps keep the bananas fresh and prevents the wafers from instantly softening into mush.
Step 5: Layer Your Banana Pudding
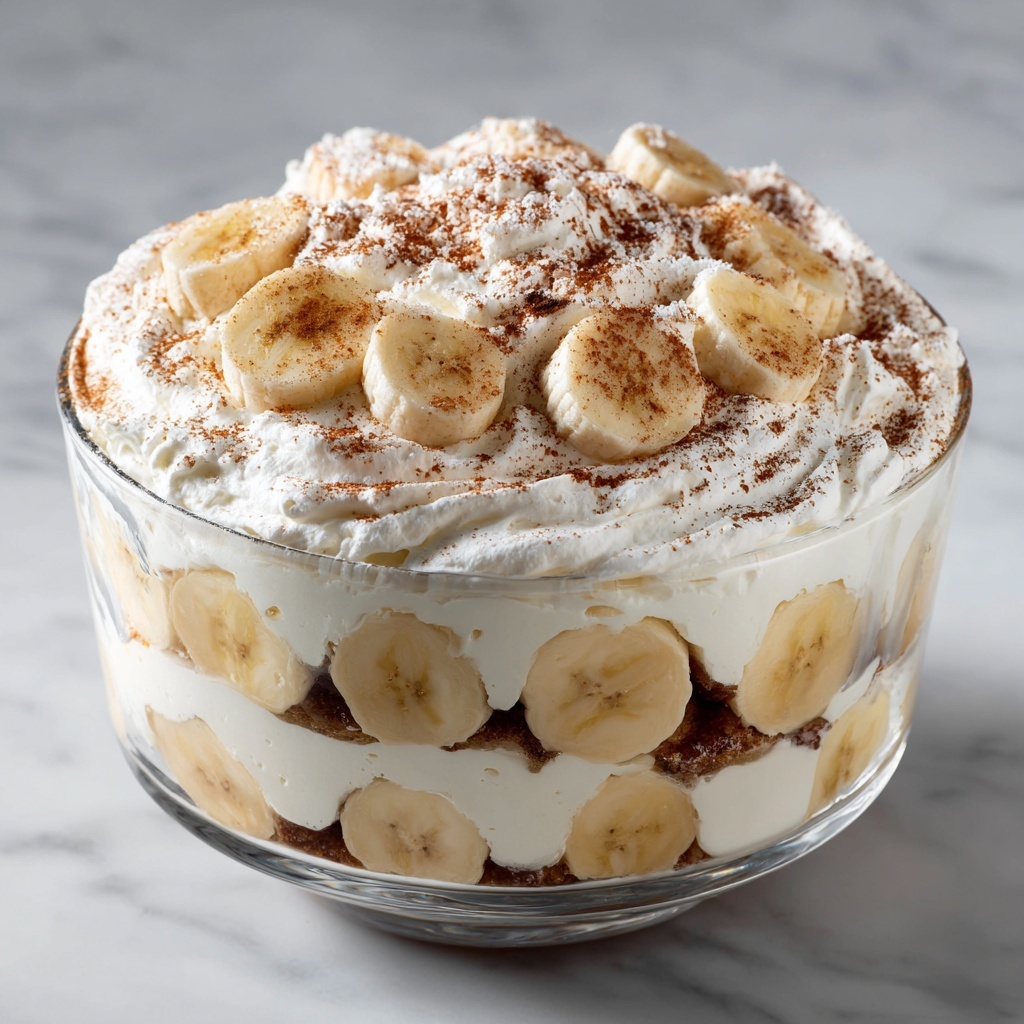
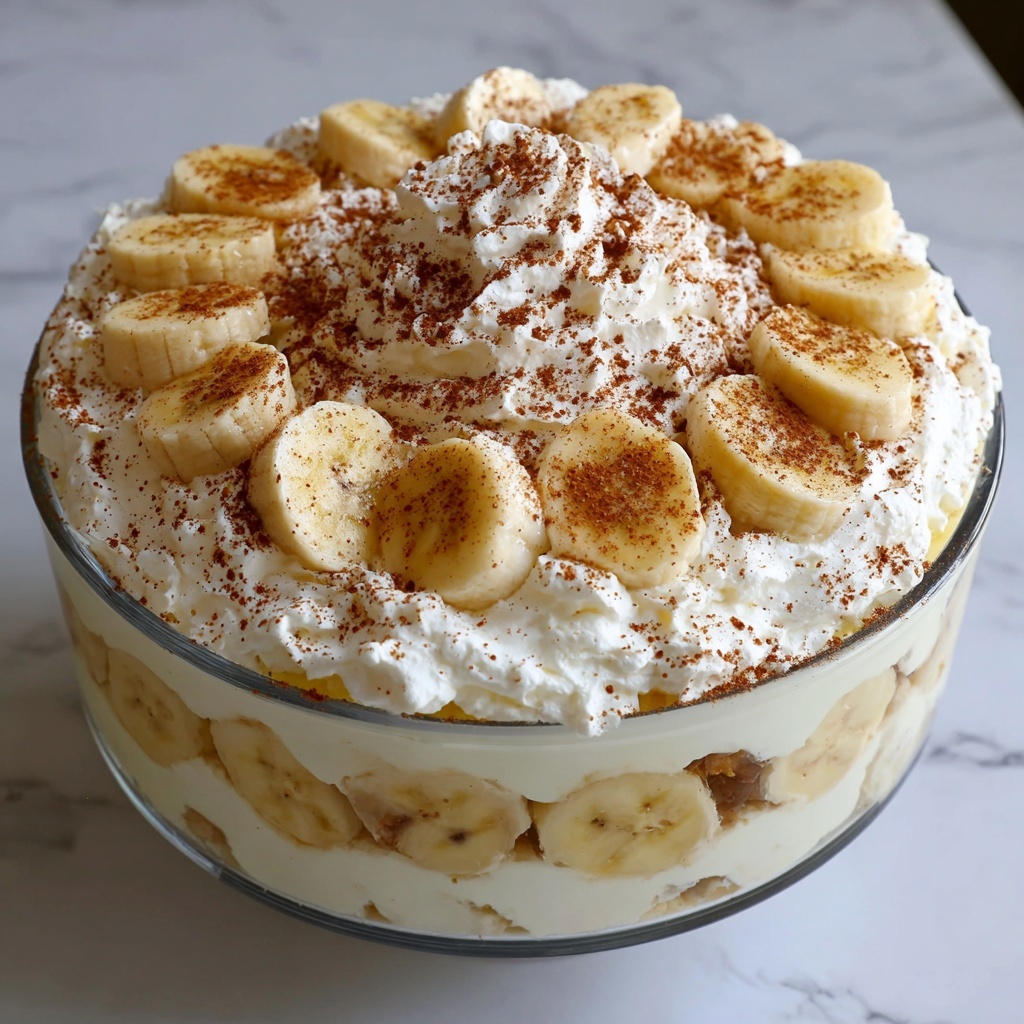
In a large glass serving dish or trifle bowl, build your masterpiece by layering vanilla wafers, sliced bananas, and the luscious pudding. Repeat these layers until you use all ingredients, finishing with a layer of pudding on top for a smooth, polished look. Cover and chill it in the refrigerator for at least four hours or overnight to allow the flavors to meld and the wafers to soften perfectly.
How to Serve Banana Pudding From Scratch Recipe

Garnishes
Before serving, add a generous cloud of whipped cream on top. For extra visual appeal and texture, sprinkle some crushed vanilla wafers or add a few banana slices right before plating. These simple touches elevate the presentation and add fresh, inviting contrasts.
Side Dishes
Banana pudding is often enjoyed on its own, but if you want to pair it, think fresh fruit salads or a crisp iced tea, which perfectly balance the dessert’s richness. A simple scoop of vanilla ice cream on the side is also a delight for those who crave even more indulgence.
Creative Ways to Present
For a fun twist, try individual parfait glasses for portion control and a charming look. Layer the banana pudding with extra crushed wafers and banana slices in clear glasses so guests can admire all the beautiful layers. You can even add a drizzle of caramel or chocolate sauce for a decadent flair.
Make Ahead and Storage
Storing Leftovers
Keep your banana pudding covered tightly with plastic wrap in the refrigerator. It stays fresh for 2 to 3 days. The flavors actually deepen with time, but the bananas may darken, so freshness is best enjoyed sooner.
Freezing
This dessert doesn’t freeze well because bananas and wafers change texture when thawed. For the best experience, it’s recommended to enjoy your Banana Pudding From Scratch Recipe fresh or refrigerated only.
Reheating
Since this is a chilled dessert, reheating is not necessary or advised. Serve it cold straight from the refrigerator, allowing that wonderful creamy texture and fresh banana flavor to shine.
FAQs
Can I use low-fat milk instead of whole milk?
While low-fat milk can be substituted, whole milk gives the pudding its rich and creamy consistency. Using lower-fat milk might result in a thinner texture and less luscious mouthfeel.
How do I prevent the bananas from browning?
Slicing the bananas right before layering helps keep them fresh. You can also lightly brush them with lemon juice, which acts as a natural preservative against browning.
Is it possible to make this recipe vegan?
To make a vegan version, you’ll need to replace the milk and eggs with suitable plant-based alternatives like coconut milk and cornstarch or agar-agar for thickening. The flavor and texture will differ, but it can still be delicious.
Can I prepare this banana pudding without chilling overnight?
Chilling for at least four hours is important for the pudding to set properly and for flavors to meld, but if you’re short on time, a few hours will work. Just keep in mind the texture won’t be as firm or fully developed.
What’s the best way to toast the vanilla wafers?
Simply spread the wafers on a baking sheet and bake them at 350°F (175°C) for about 5 minutes until lightly golden and crisp. This adds a lovely depth of flavor and crunch to the final dessert.
Final Thoughts
I truly hope you give this Banana Pudding From Scratch Recipe a try because it’s one of those timeless desserts that brings comfort and nostalgia in every bite. It’s simple, satisfying, and guaranteed to impress family and friends whether you’re making it for a casual weekend or a special occasion. Once you taste the creamy layers and fresh bananas, you’ll understand why it’s a beloved classic in Southern kitchens everywhere.
Print
Banana Pudding From Scratch Recipe
- Prep Time: 15 minutes
- Cook Time: 10 minutes
- Total Time: 4 hours 25 minutes
- Yield: 6–8 servings
- Category: Dessert
- Method: Stovetop
- Cuisine: Southern American
- Diet: Vegetarian
Description
This classic Southern Banana Pudding recipe is made from scratch with ripe bananas, creamy homemade vanilla pudding, and layers of vanilla wafers. It’s a comforting no-bake dessert that’s chilled to perfection and topped with whipped cream for a rich, silky finish.
Ingredients
For the Pudding
- 3 cups whole milk
- ¾ cup granulated sugar
- ¼ cup cornstarch
- ¼ tsp salt
- 4 large egg yolks
- 2 tbsp unsalted butter
- 2 tsp vanilla extract
For Assembly
- 3 ripe bananas, sliced
- 1 box vanilla wafers
- Whipped cream (for topping)
Instructions
- Prepare the pudding base: In a medium saucepan, whisk together the sugar, cornstarch, and salt until combined. In a separate bowl, whisk the egg yolks. Slowly add the cold milk to the egg yolks while whisking constantly, then gradually pour this mixture into the saucepan with the dry ingredients, whisking continually.
- Cook the pudding: Place the saucepan over medium heat and cook, stirring constantly to prevent lumps and scorching. Continue cooking until the mixture thickens and starts to bubble, approximately 8–10 minutes.
- Finish the pudding: Remove the saucepan from heat. Stir in the unsalted butter and vanilla extract until the pudding is smooth and glossy. Allow it to cool slightly while you prepare the layers.
- Layer the dessert: In a large serving dish or trifle bowl, arrange a layer of vanilla wafers followed by sliced bananas and then a layer of the warm pudding. Repeat the layering process until all the ingredients are used, finishing with a layer of pudding on top.
- Chill the pudding: Cover the dish with plastic wrap and refrigerate for at least 4 hours or overnight to allow the flavors to meld and the pudding to set firmly.
- Serve: Before serving, top the pudding with whipped cream and garnish with extra banana slices or vanilla wafers if desired for an elegant presentation.
Notes
- Slice bananas just before layering to prevent browning and keep the dessert fresh.
- For enhanced flavor and texture, lightly toast the vanilla wafers before assembling the pudding.
- You may substitute store-bought whipped cream with homemade whipped cream or meringue for topping.

